A Beautiful, Simple, Customizable Kitchen Multi-timer
Final presentation from the Iovine & Young Academy's Product Innovation Master's program Foundation Studio class taken as an elective.
This product design project started off as diverse sketches of kitchen products, and transformed into an iterative human-centered-design process that culminated in a kitchen multi-timer that sports a LCD pressure-writing display for labeling timers with a synchronized countdown feature.
Throughout the semester, I reconnected with several home cooks I interviewed and surveyed to gather feedback on each stage in the design process. The Academy provided resources for fashinoning low-fidelity prototypes of Writetime out of cardboard, polyurethane foam, and provided a 3D print of the model I designed in Shapr3D on iPad. The presentation serves as a comprehensive overview of the process, from market research and blue ocean strategy, to final features and product renderings.
Process Deck, with Speaker's Notes
The format of our final presentations was assigned to give a comprehensive overview of our design process, market analysis, and final product features.
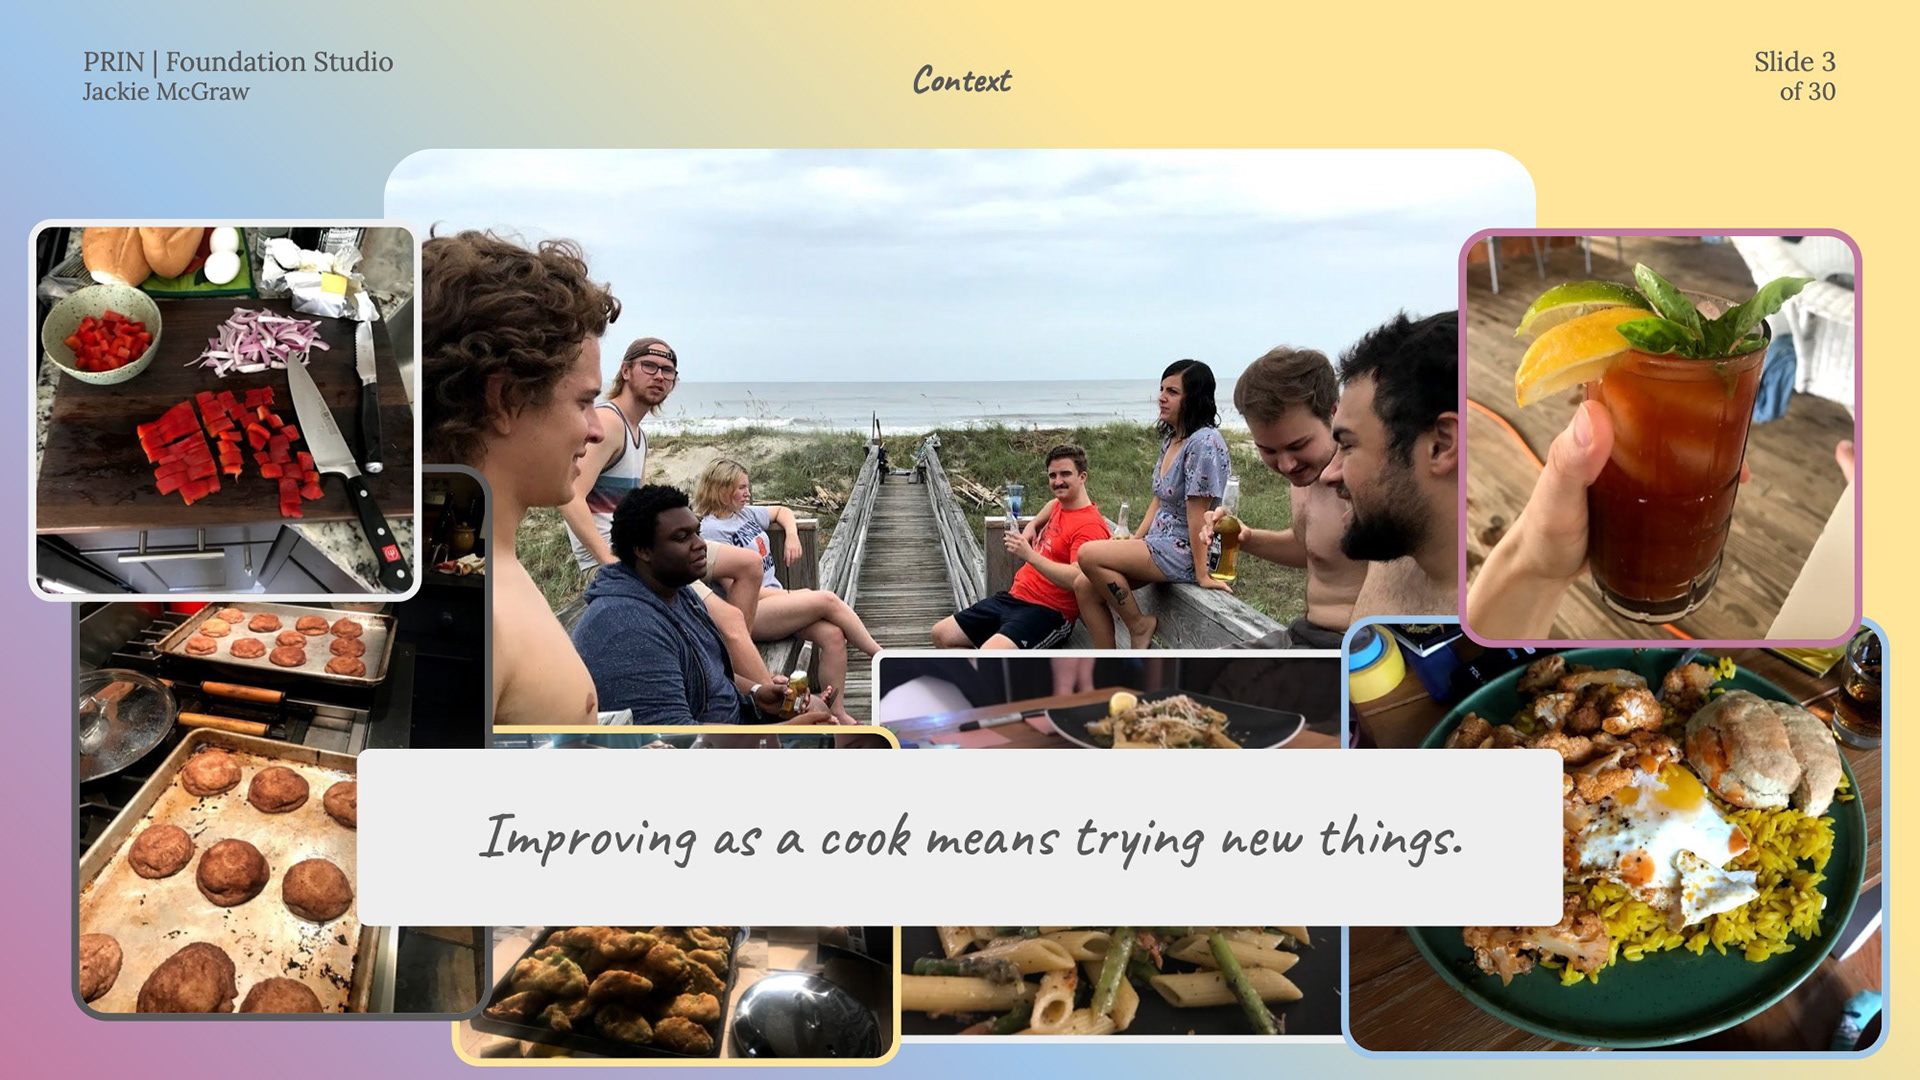
In this day and age, there are countless cooking shows on streaming services, YouTube, and elsewhere. Never before has it been so easy to find new recipes to make for family and friends—as well as the ingredients necessary to experiment with unfamiliar cuisines. Creating interesting, healthy food and viewing cooking as a fun activity in-and-of itself is an important new trend that has taken younger generations by storm in the past few years. To cater to new diets and take advantage of home cooks lucky enough to have disposable income to spend on honing their kitchen skills, consumer goods producers continually churn out an unstoppable tide of tools—and some certainly work better than others.
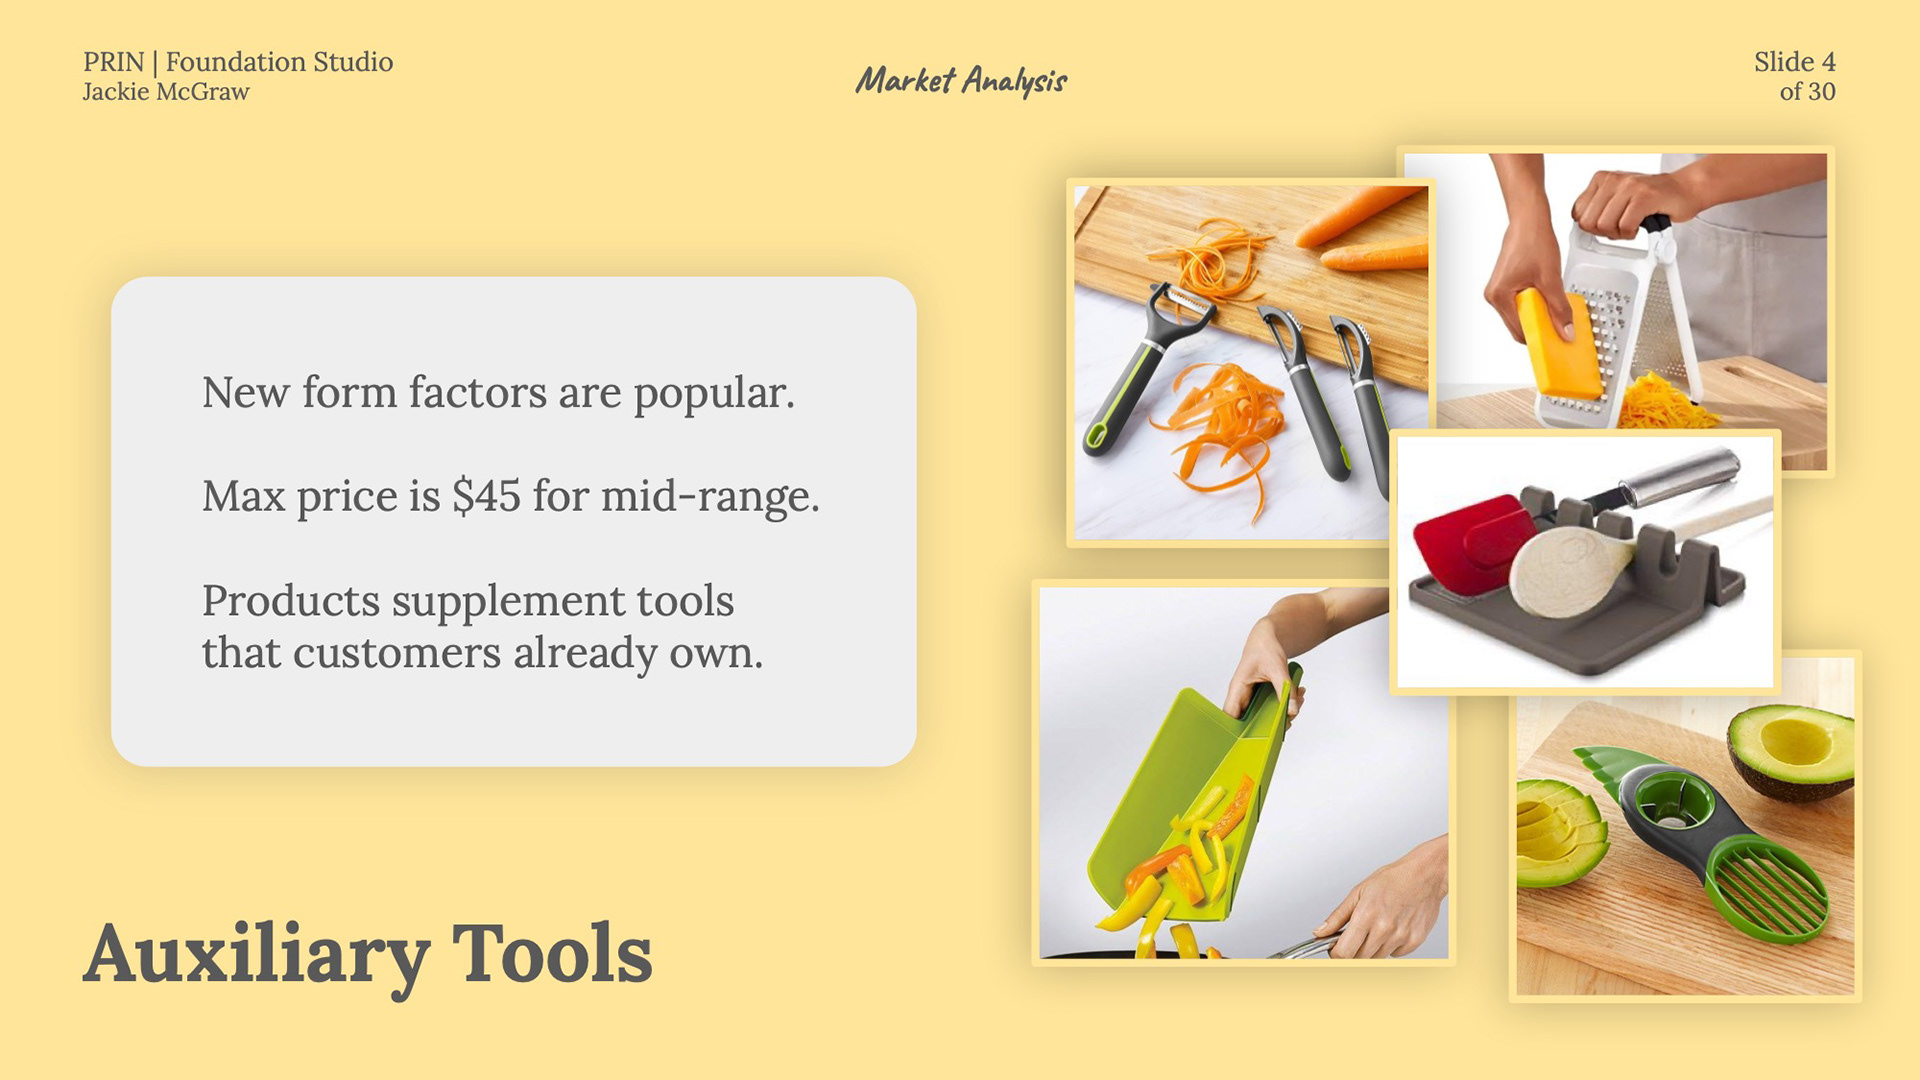
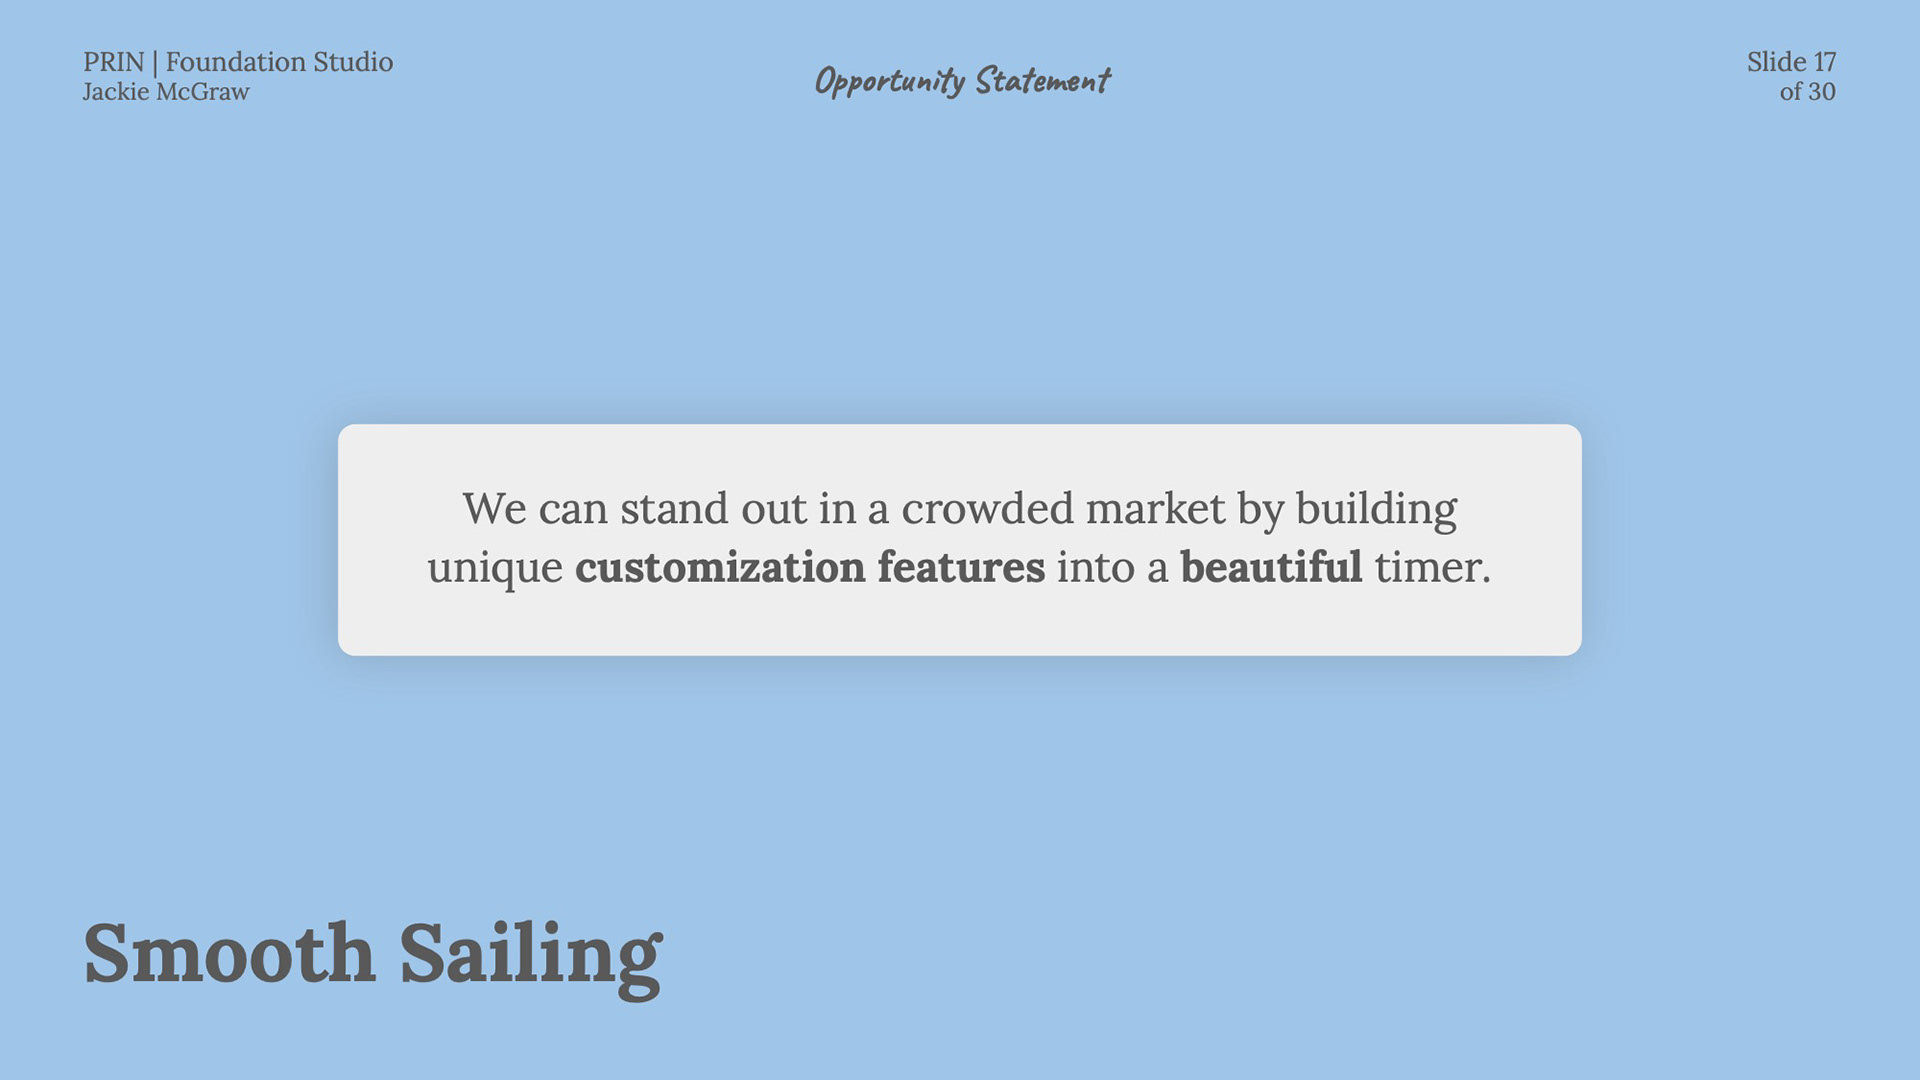
Products need to stand out in the crowded market space of kitchen gadgets and appliances. Novel ideas and innovations help differentiate products from a flood of mundane options.
While there is a wide range of prices, $50 is generally the most popular ceiling in the entry-to-mid range. When shopping for their kitchen, home cooks are looking for products that make their process easier or more fun: usually specialized prep tools or auxiliary products that help manage their existing toolkit.
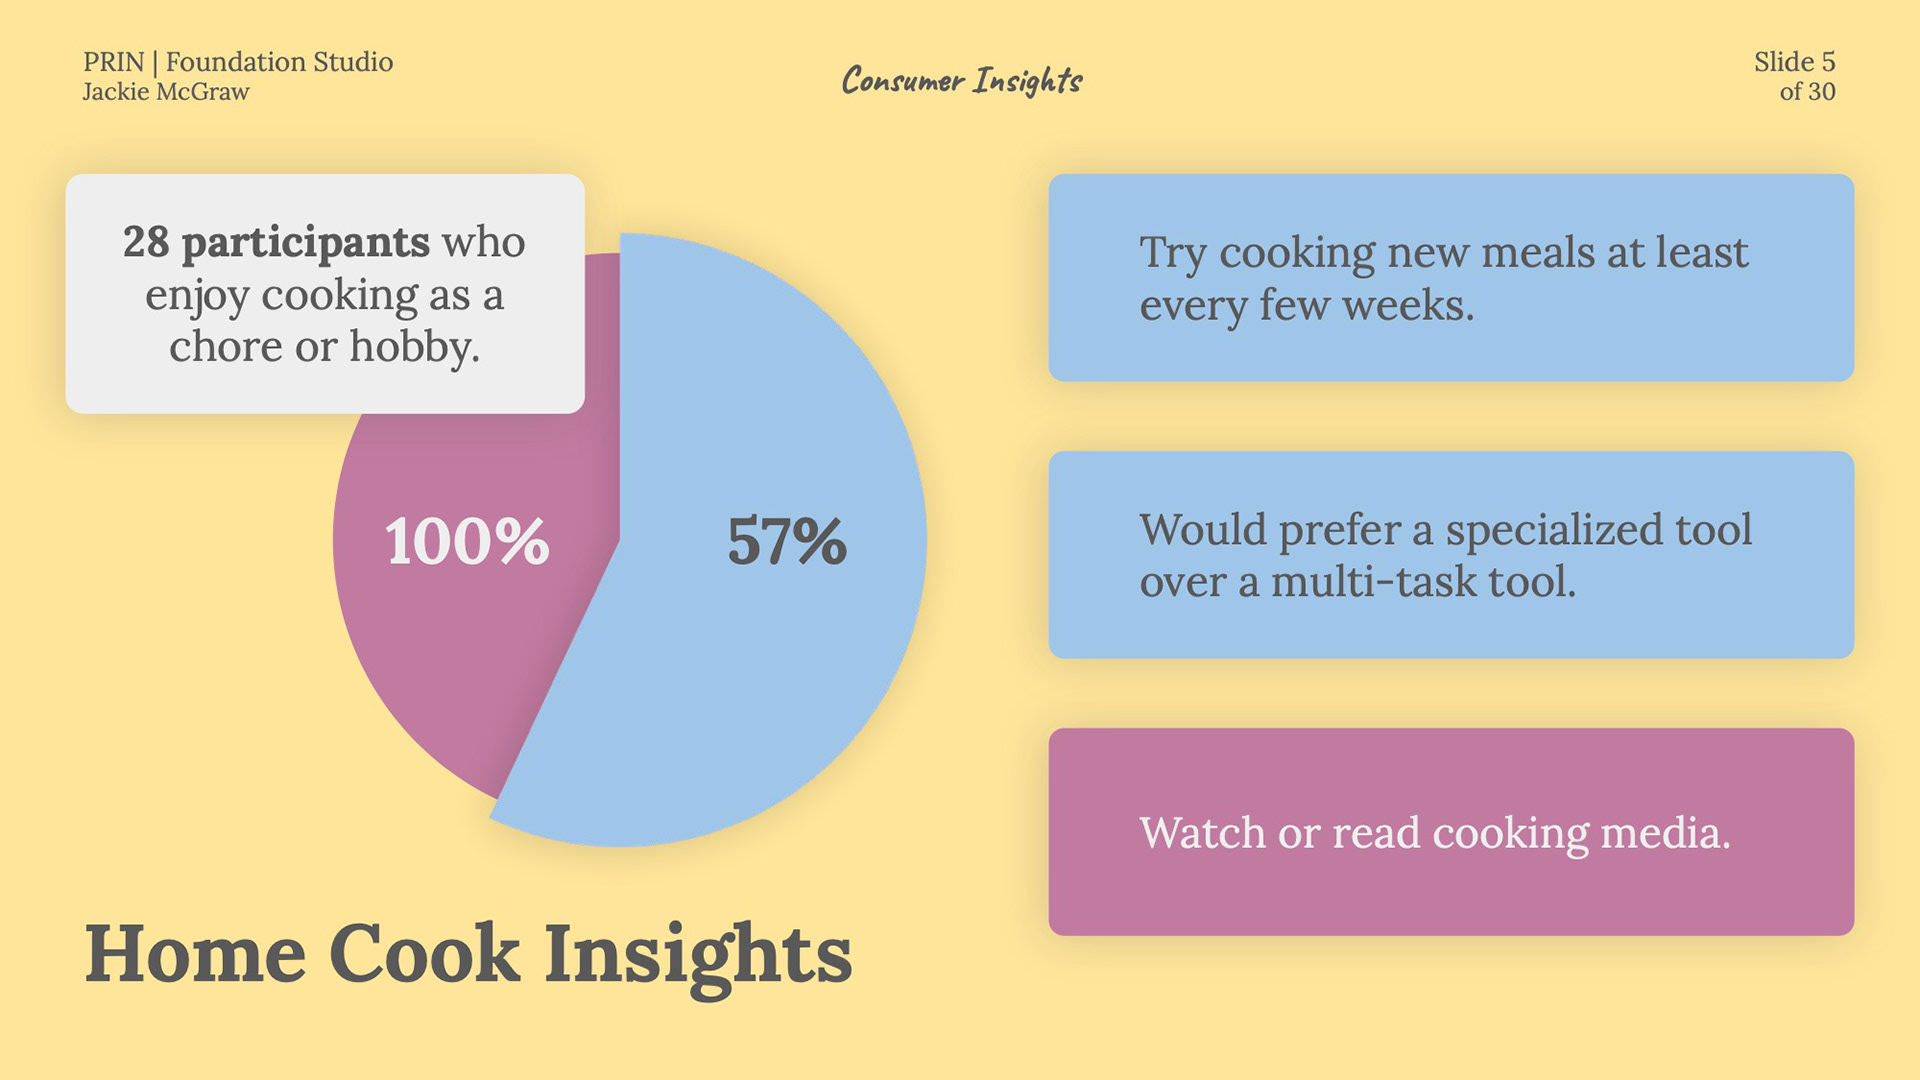
To start my process, I surveyed 28 self-described home cooks; the vast majority of participants were American millennials. A majority try cooking new meals and cuisines more than once a month. That same number would prefer to receive a product that does one task extremely well versus one that does multiple tasks only reasonably well.
All participants engage with cooking media in some form, whether spending time researching recipes, reading cooking magazines, or watching videos on YouTube. Home cooks are constantly searching for the next thing to try.
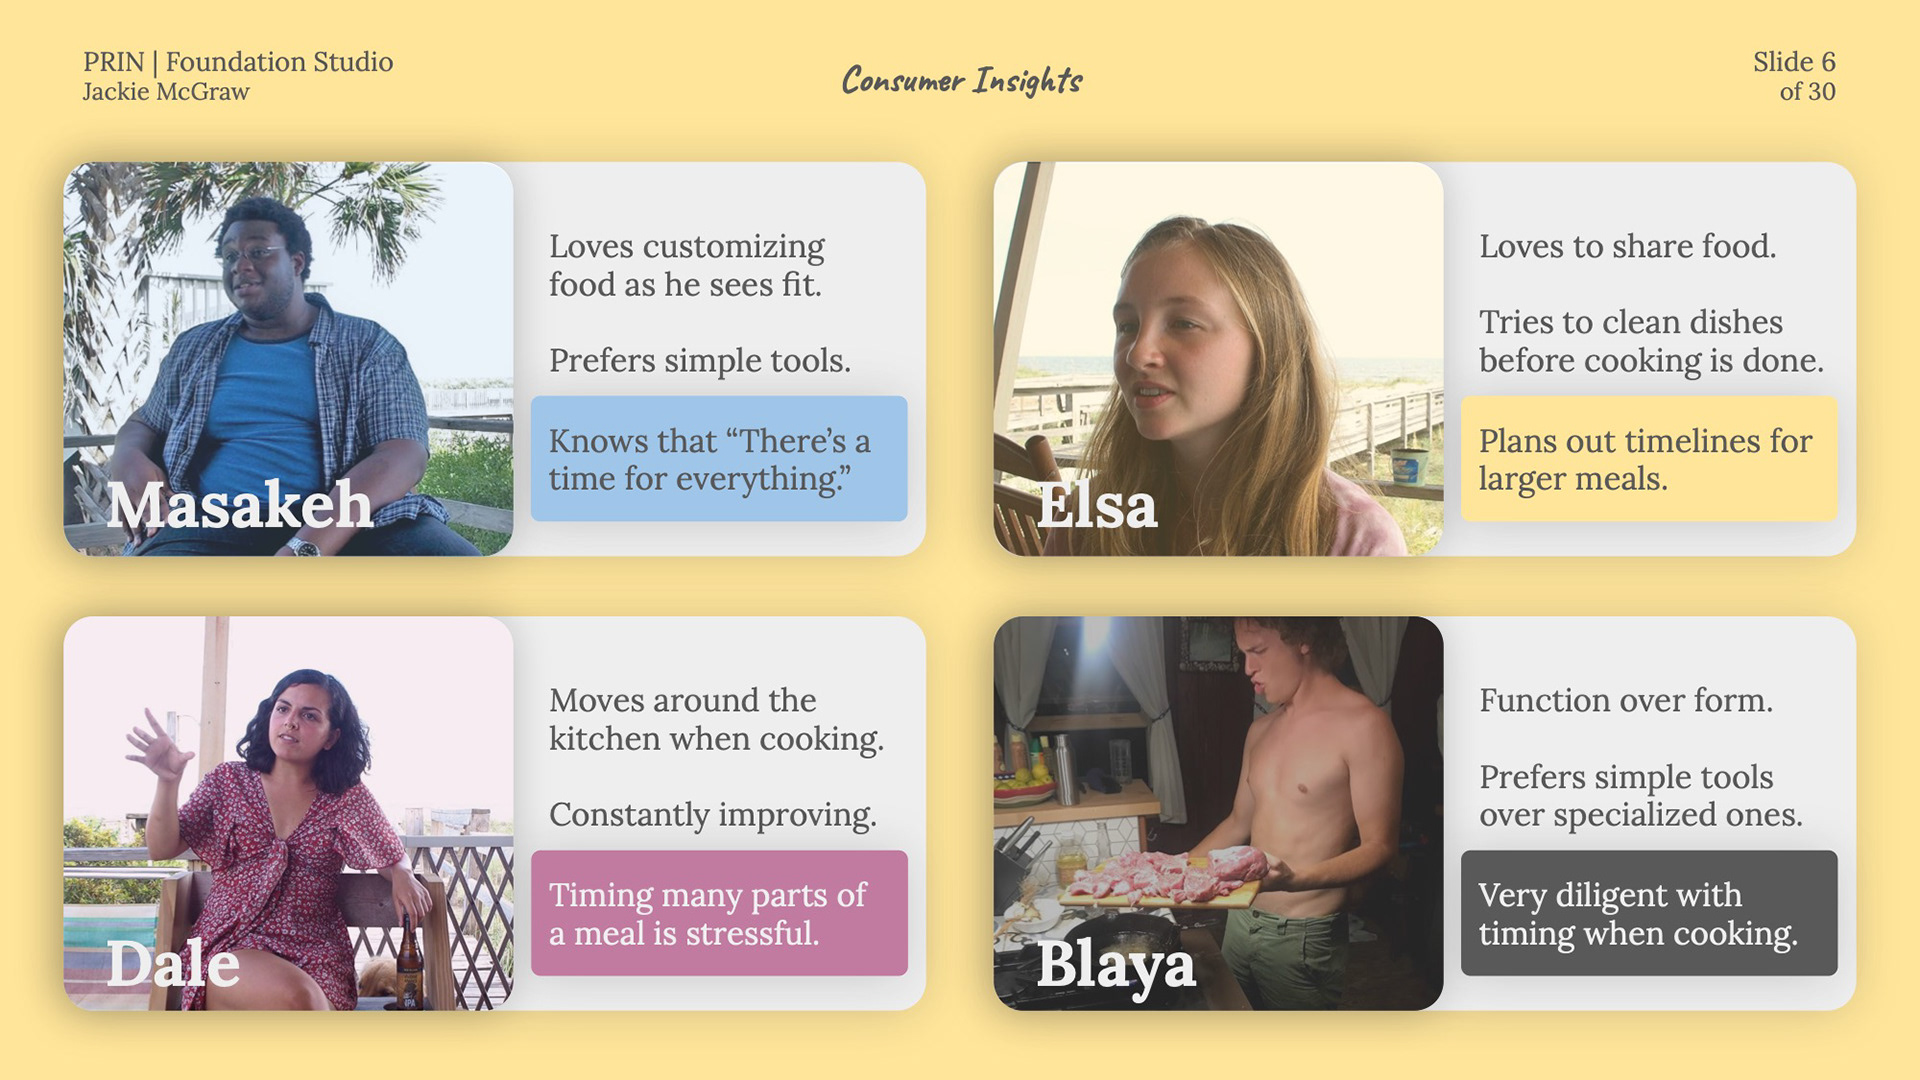
I also had the privilege of interviewing a few home cooks in person.at the end of the summer, and followed up with them throughout the design process. All of them are in their 20s, with varied employment—but all are avid home cooks that cook for themselves more often than getting food elsewhere. Most of my interviewees mentioned that they hate cleaning and actively try to minimize the amount of dishes they have to clean; mostly probably because they don’t own their dishwashers!
But the common denominator was clear: timing is a key stressor in their kitchens—it can be hard to get a recipe right the first time around when you’re juggling several constituent parts.
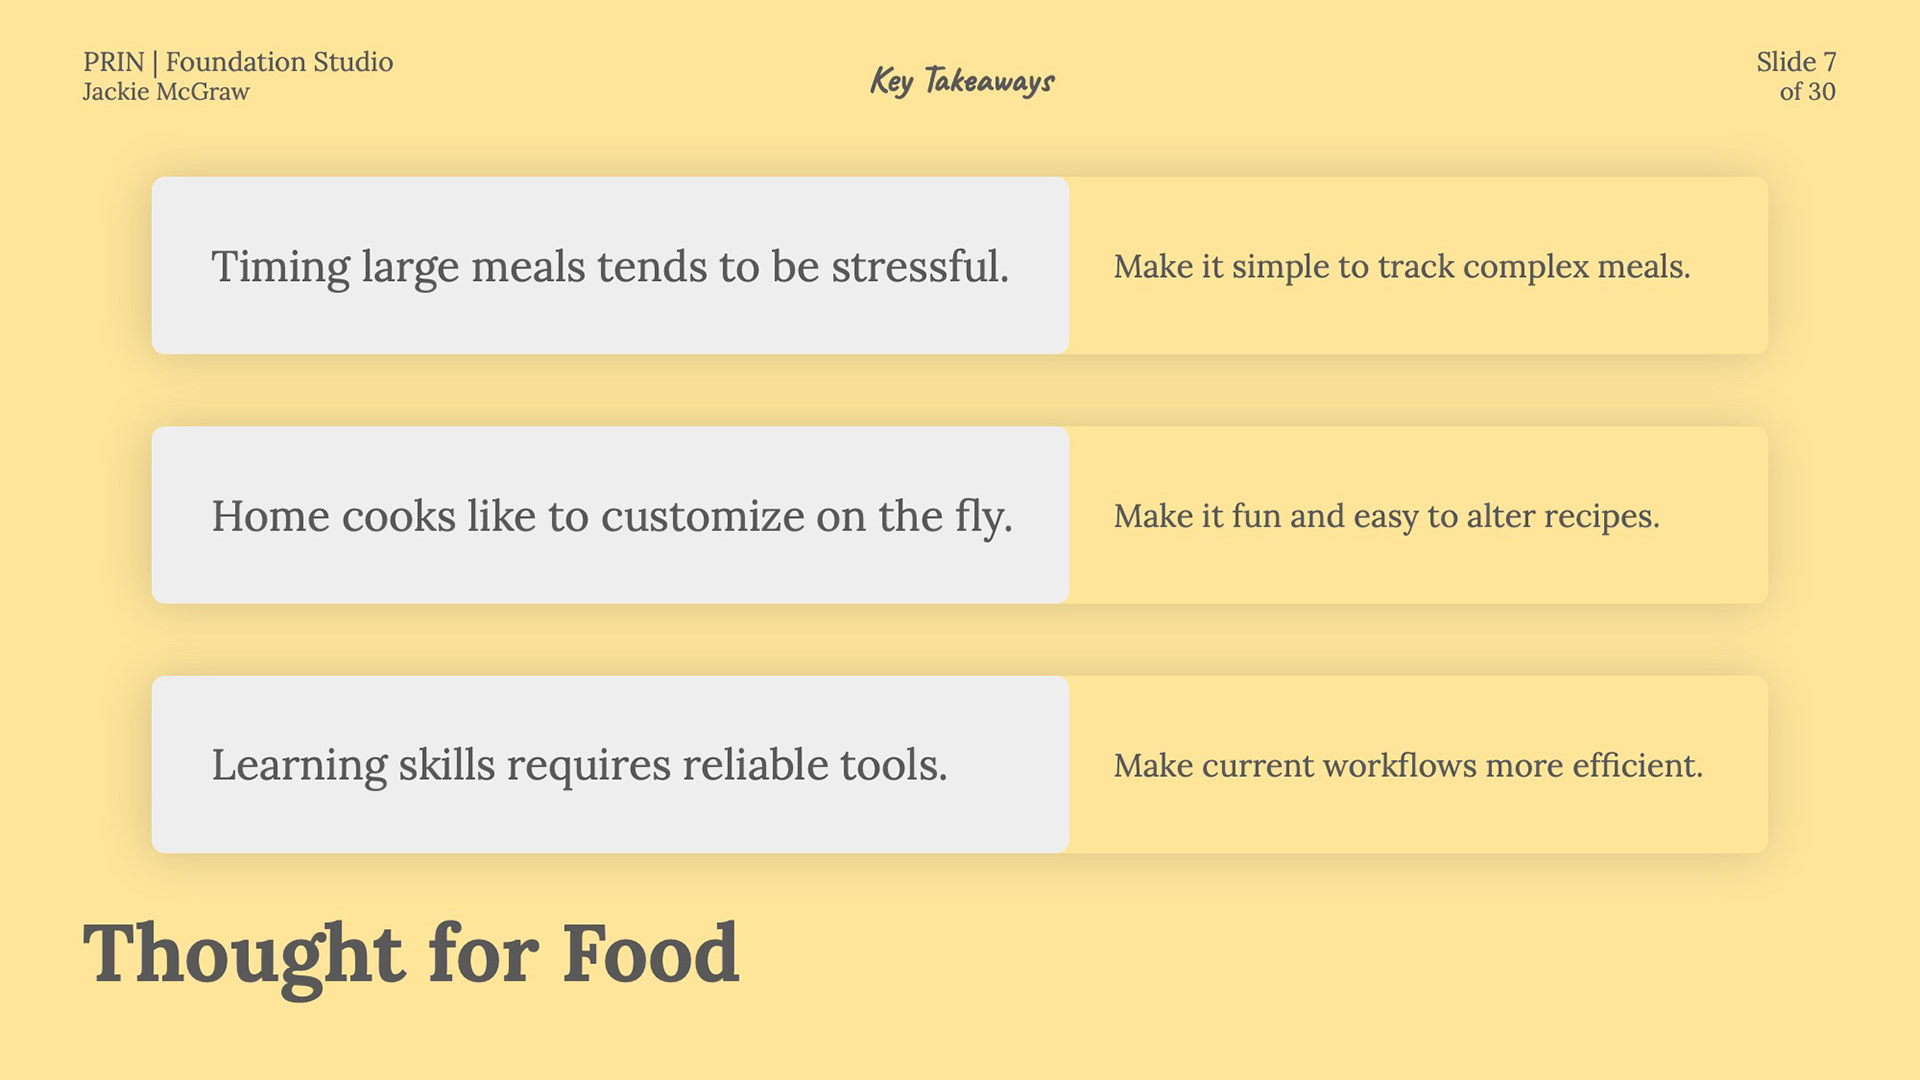
Home cooks love to learn new skills—that requires reliable, no-nonsense equipment that supplements the tools that they are already proficient with. Minimizing cognitive load and simplifying their work with techniques like mise en place, tools like sharp knives, and useful appliances that keep track of their process allows home cooks to focus on what draws them to creative cooking: having fun, and crafting something delicious and exciting to people they care deeply about.
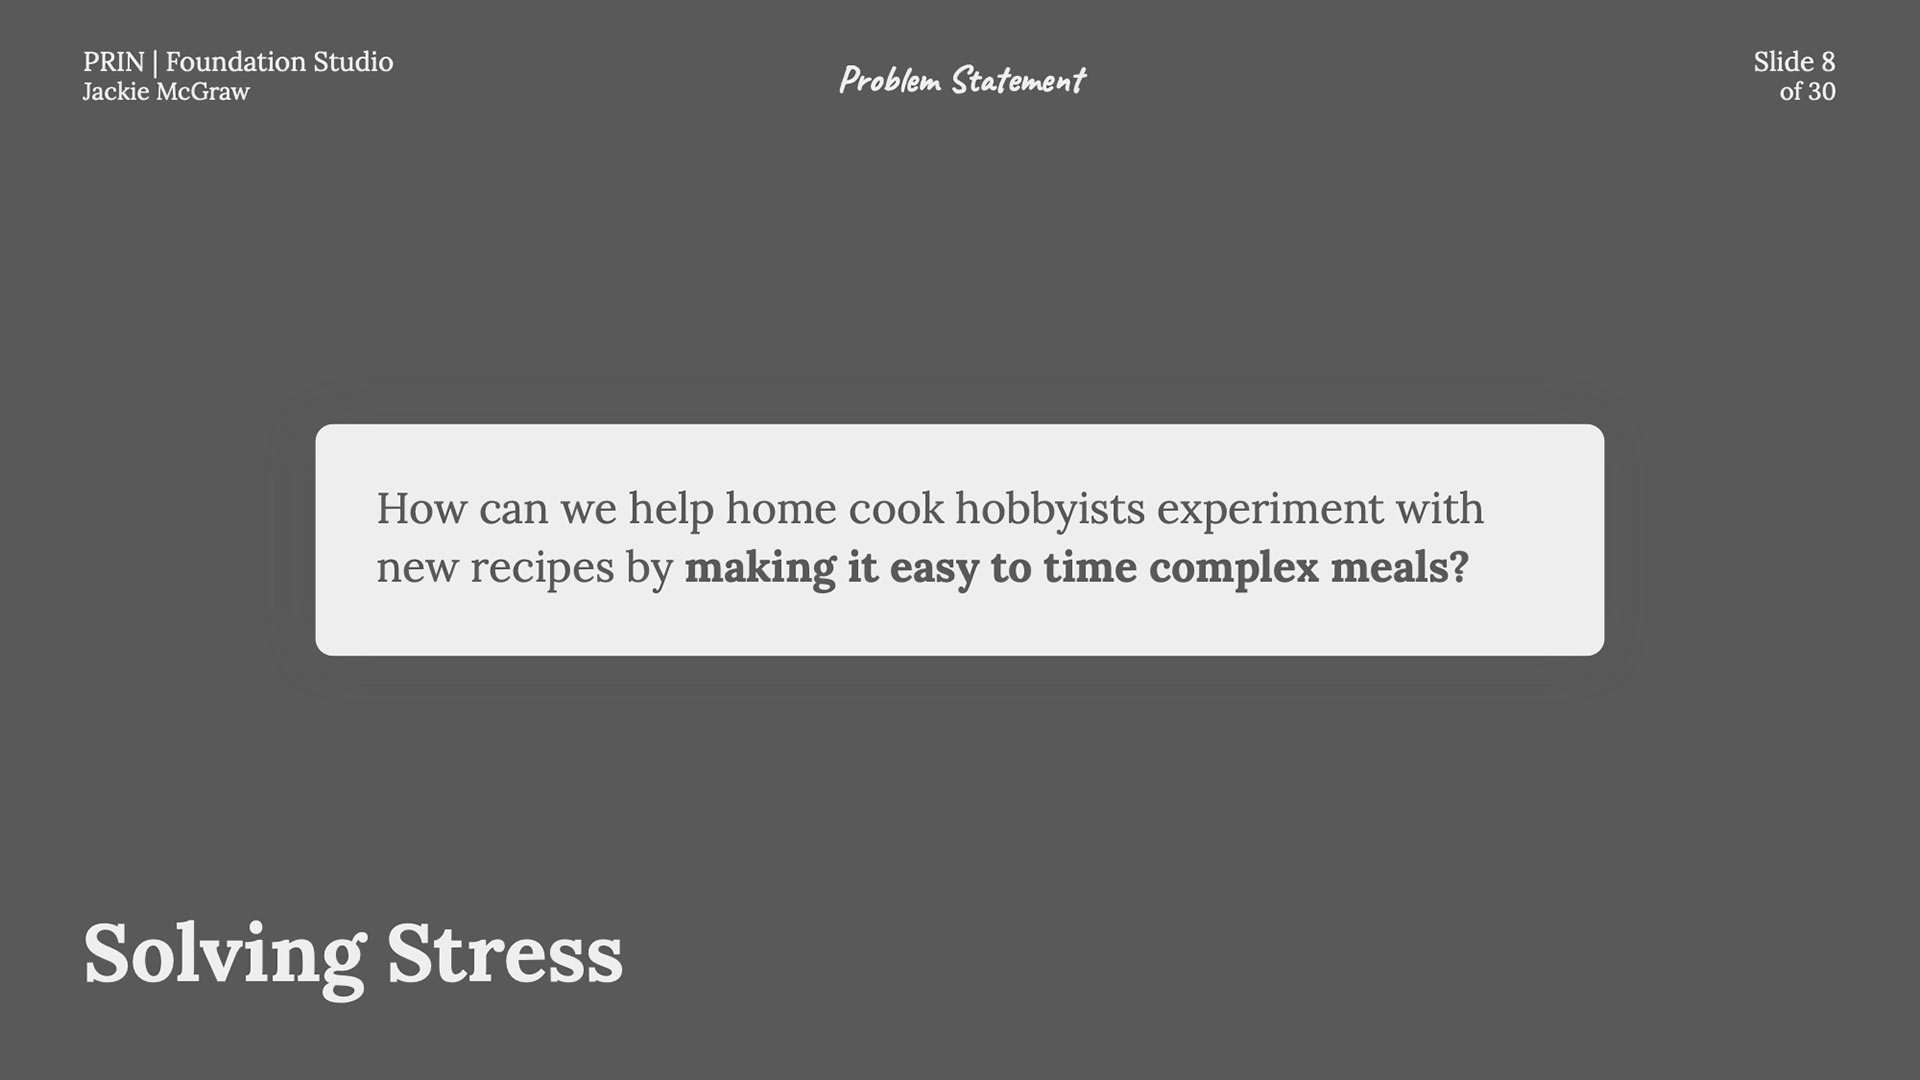
(As with most parts of this human-centered design process, this problem statement went through several rounds of revisions.)
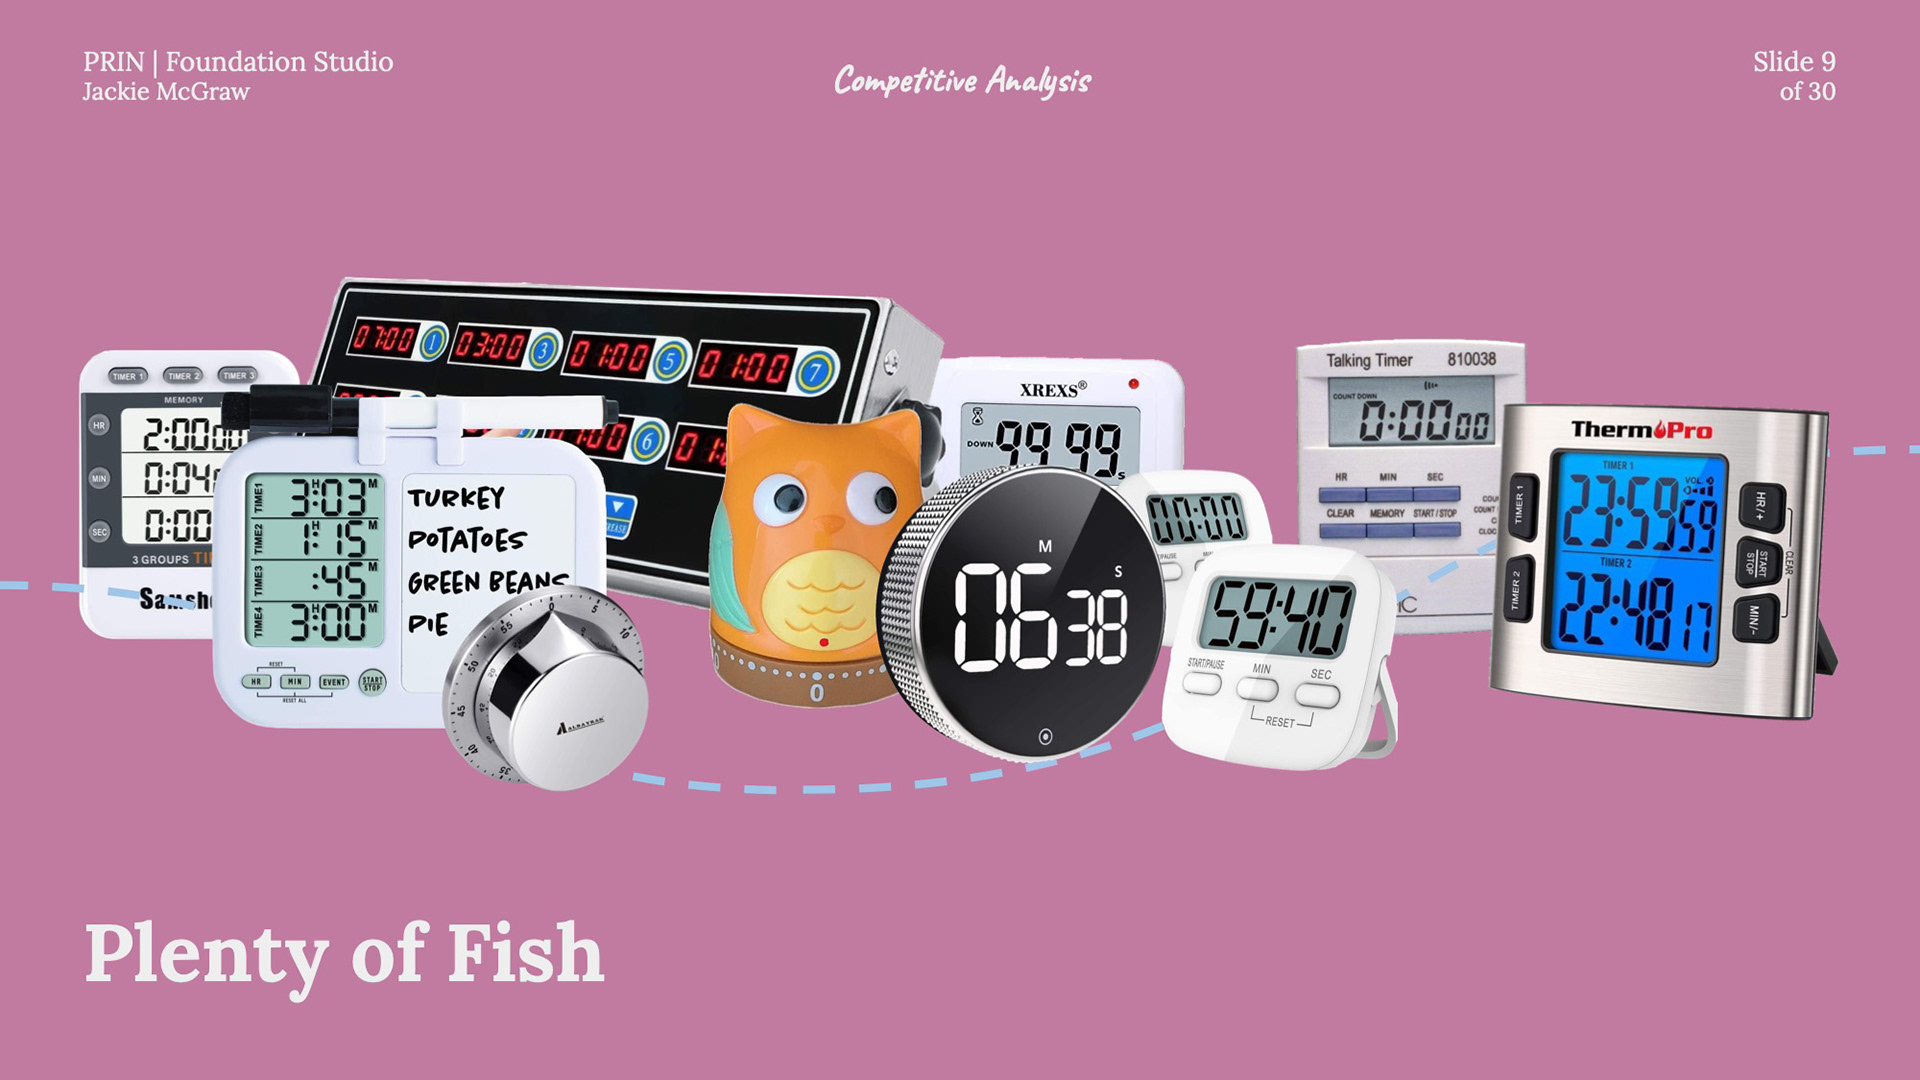
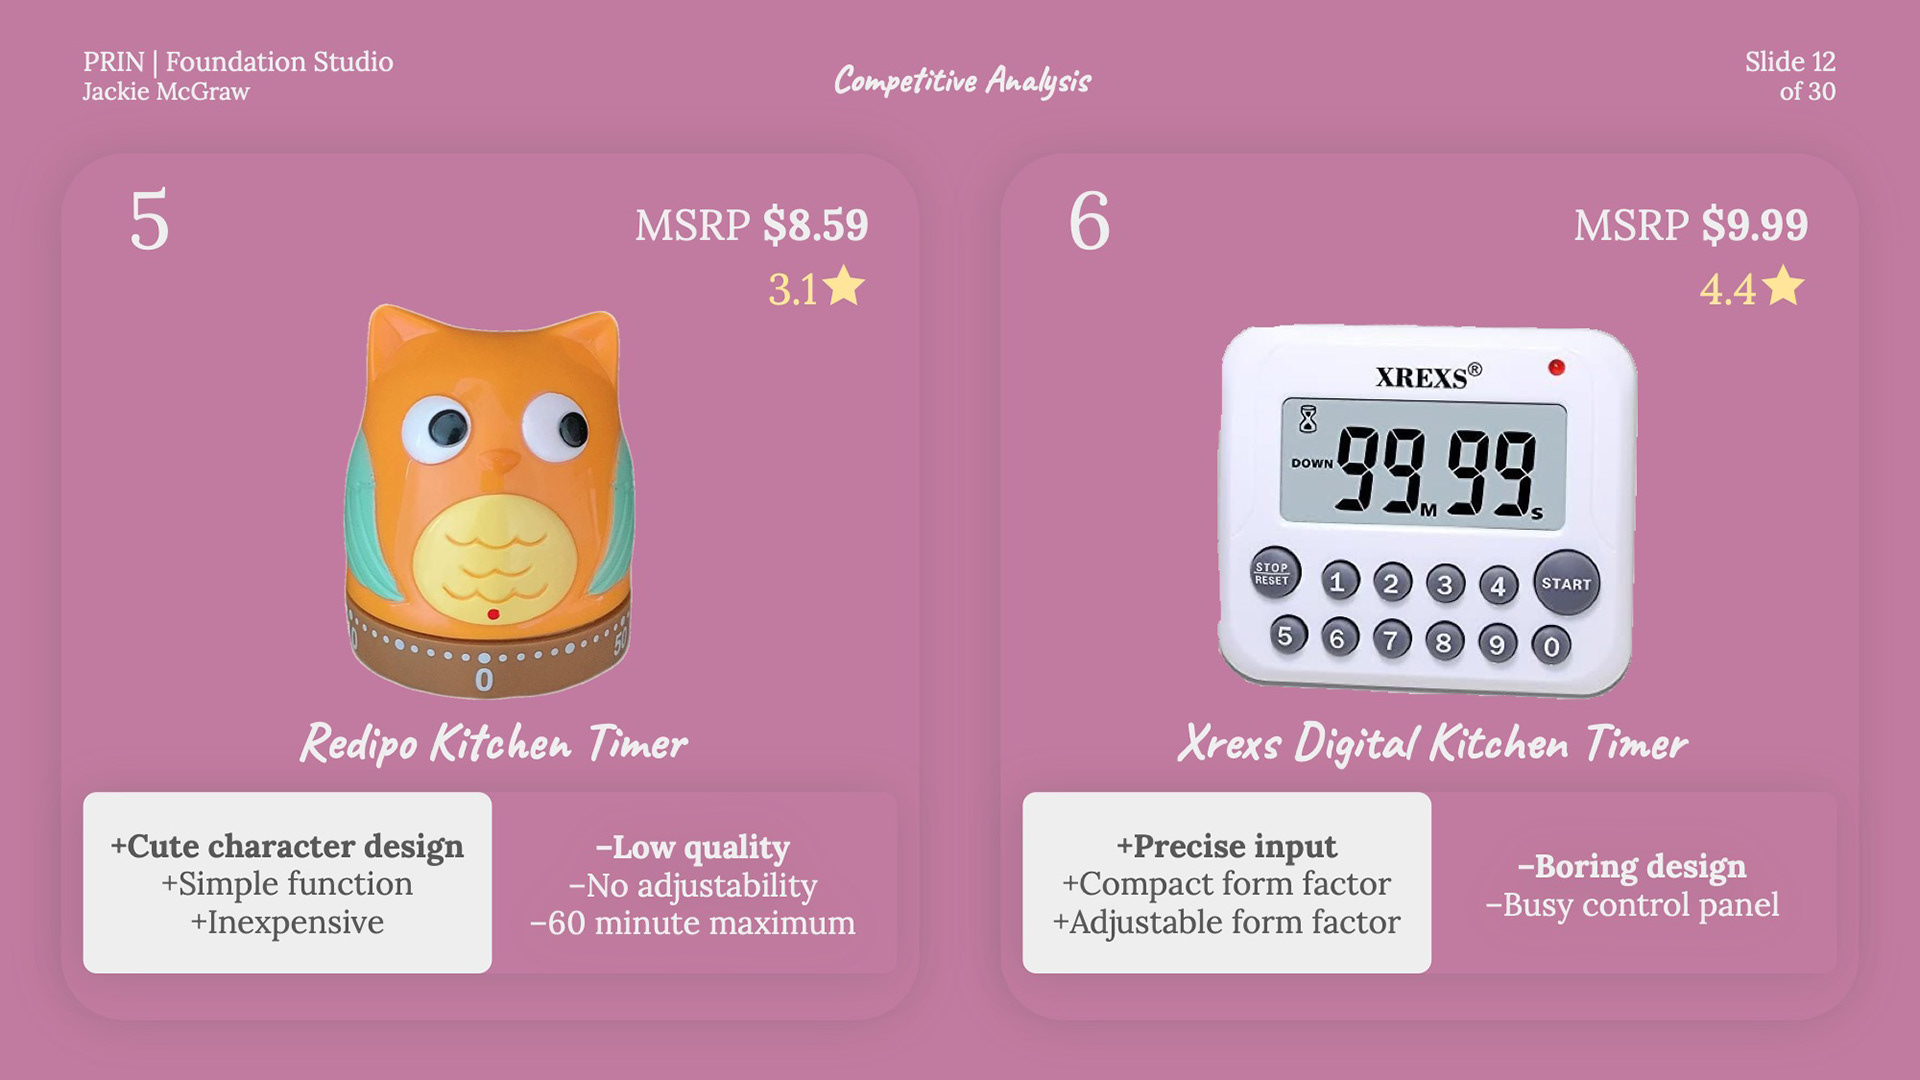
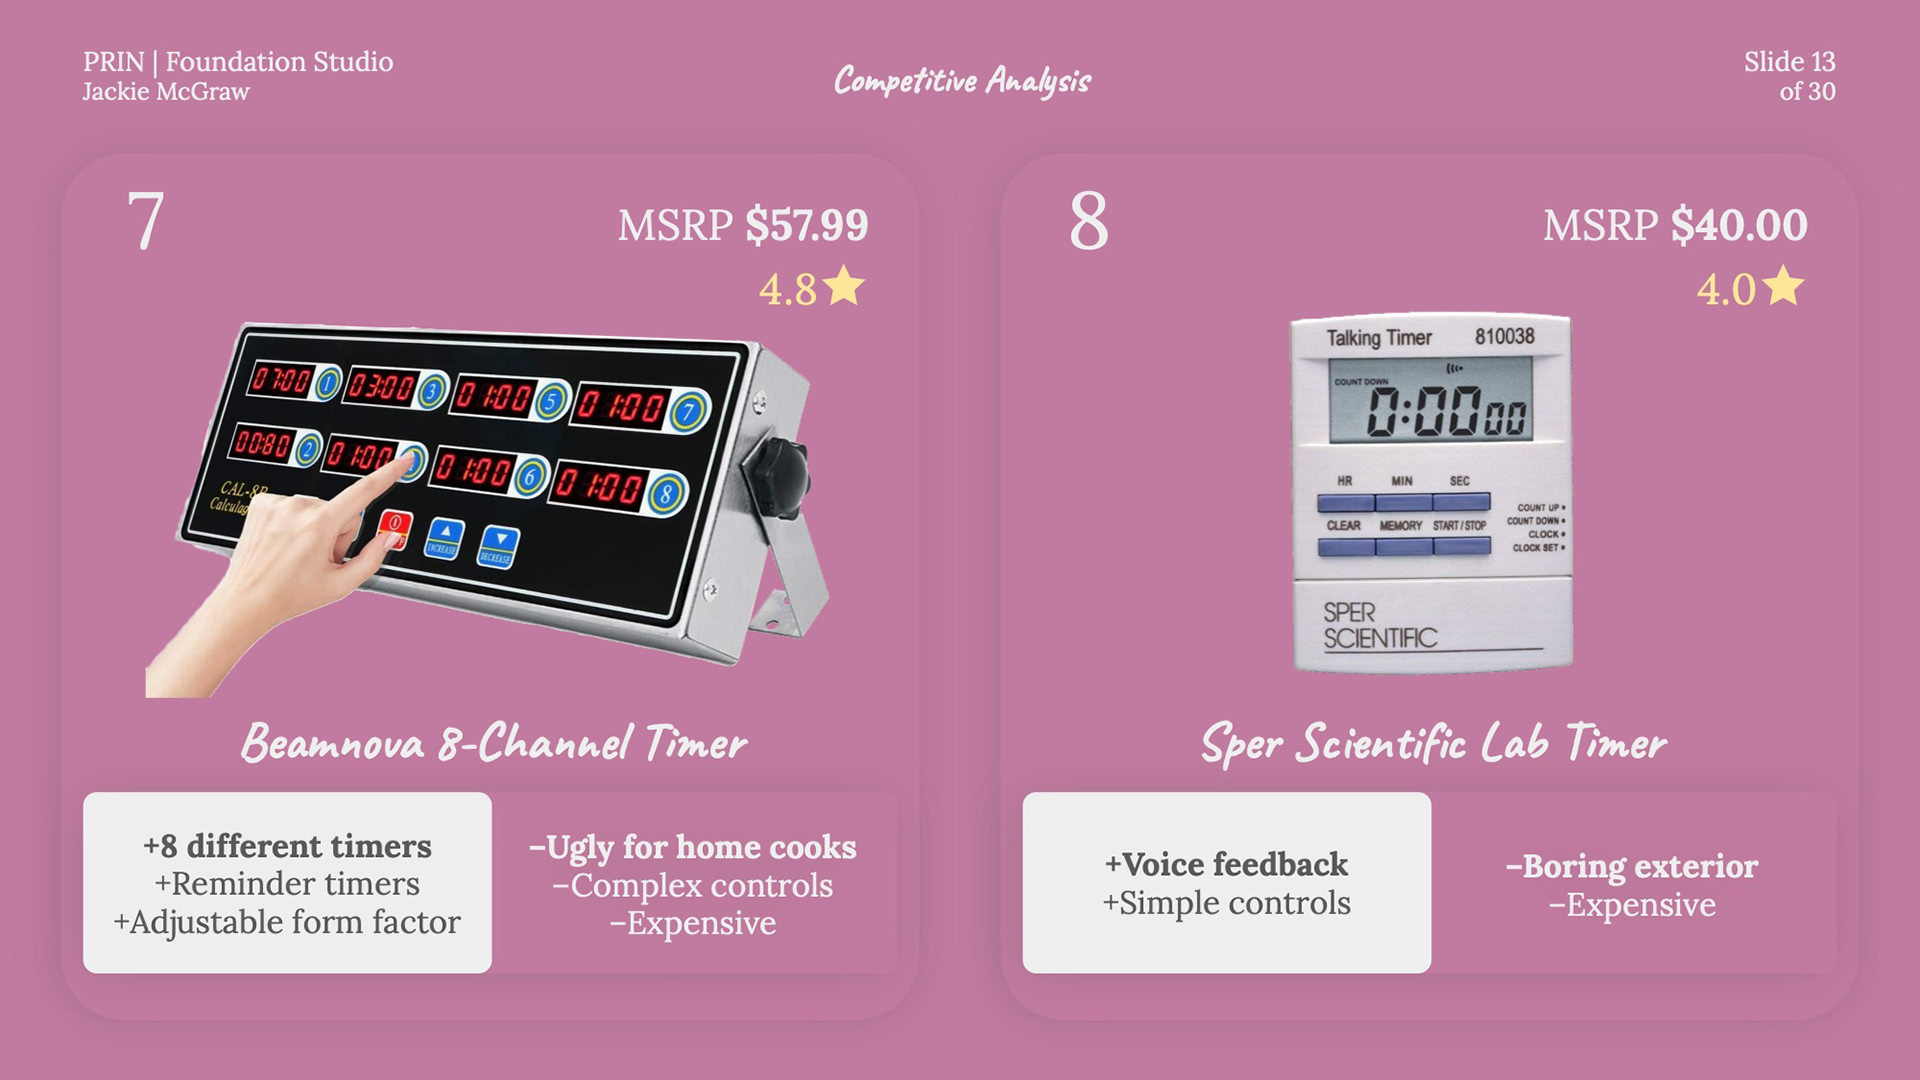

There are certainly some essential features in the timer space, like displays that light up, and magnetic backs and support for vertical mounting. Features that are harder to find include:
Multiple timers, labeling systems, adjustable settings, and—perhaps surprisingly—good aesthetics.
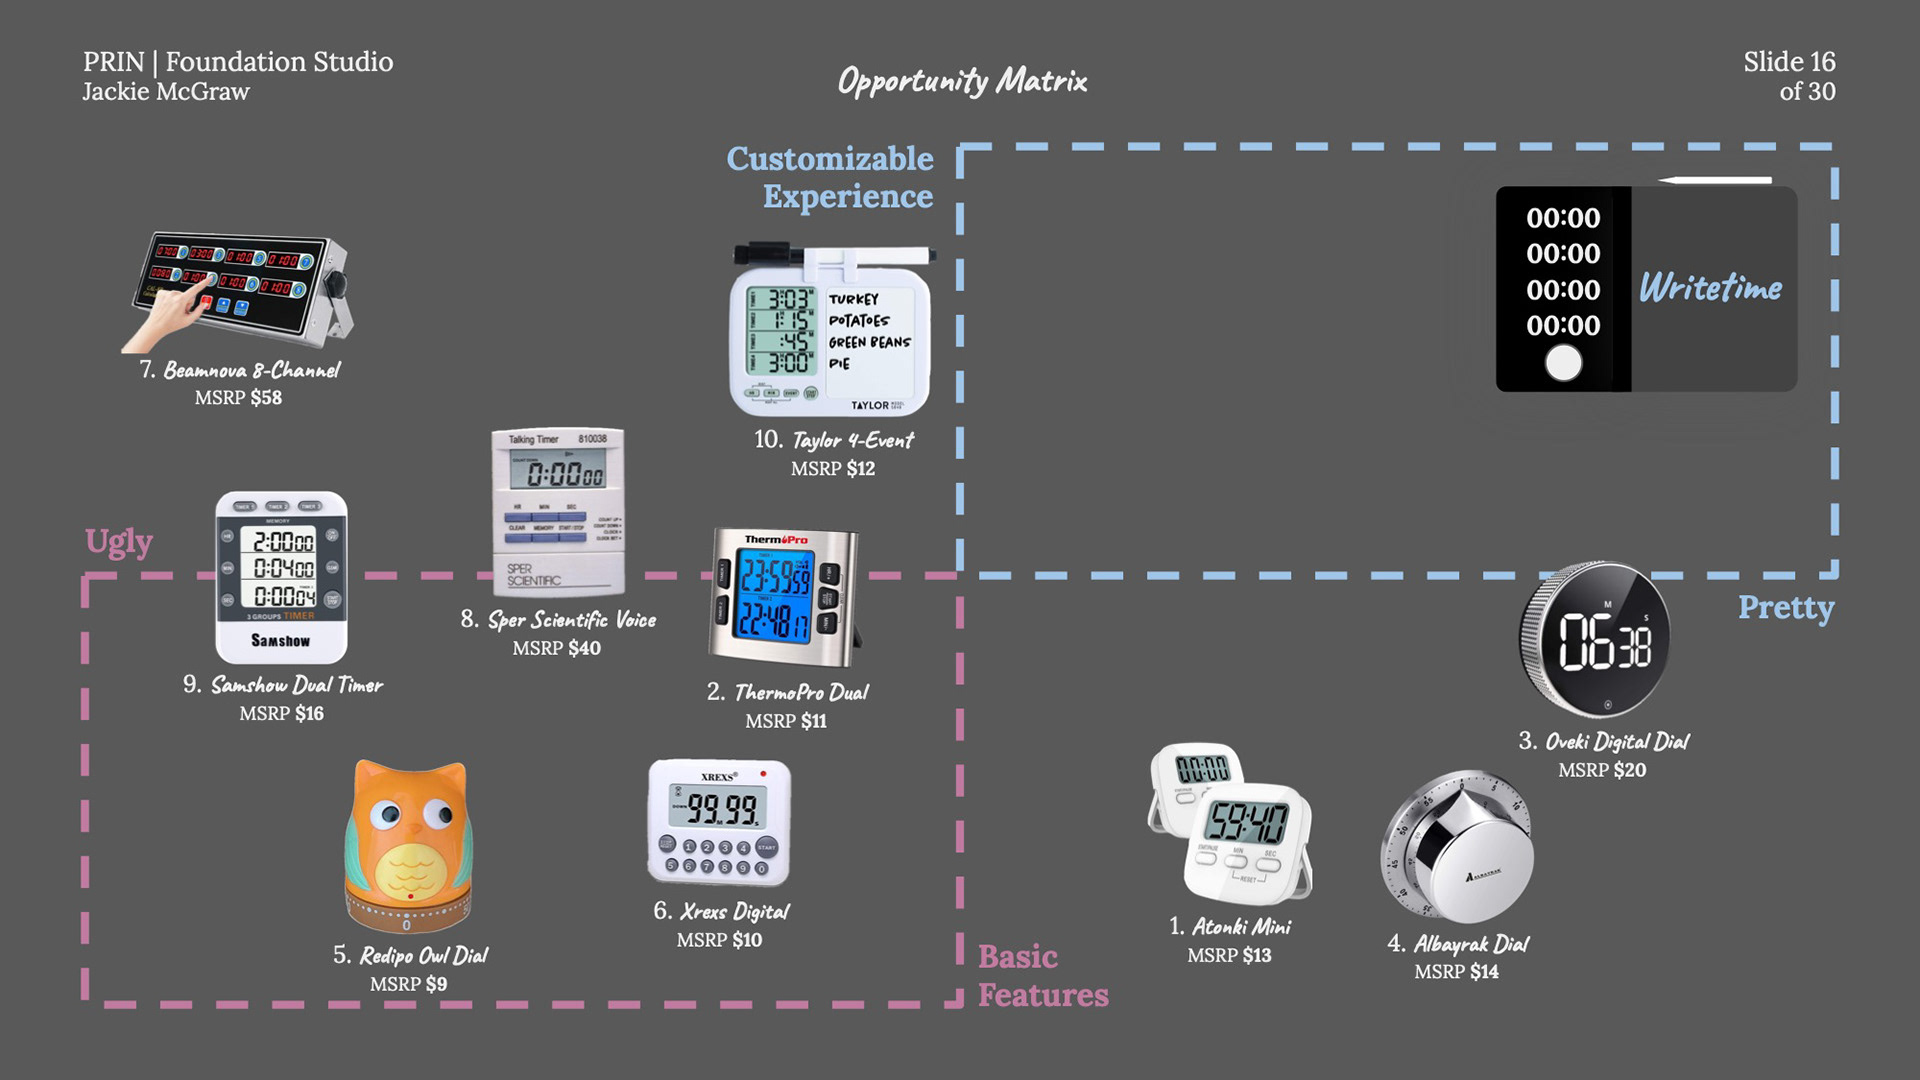
Most uncommon features have to do with giving consumers more than the bare minimum, which usually means including features that let you customize your product experience with adjustable settings, or unique interaction methods—things that media-savvy home cooks experimenting with new dishes might take more advantage of than the average person.
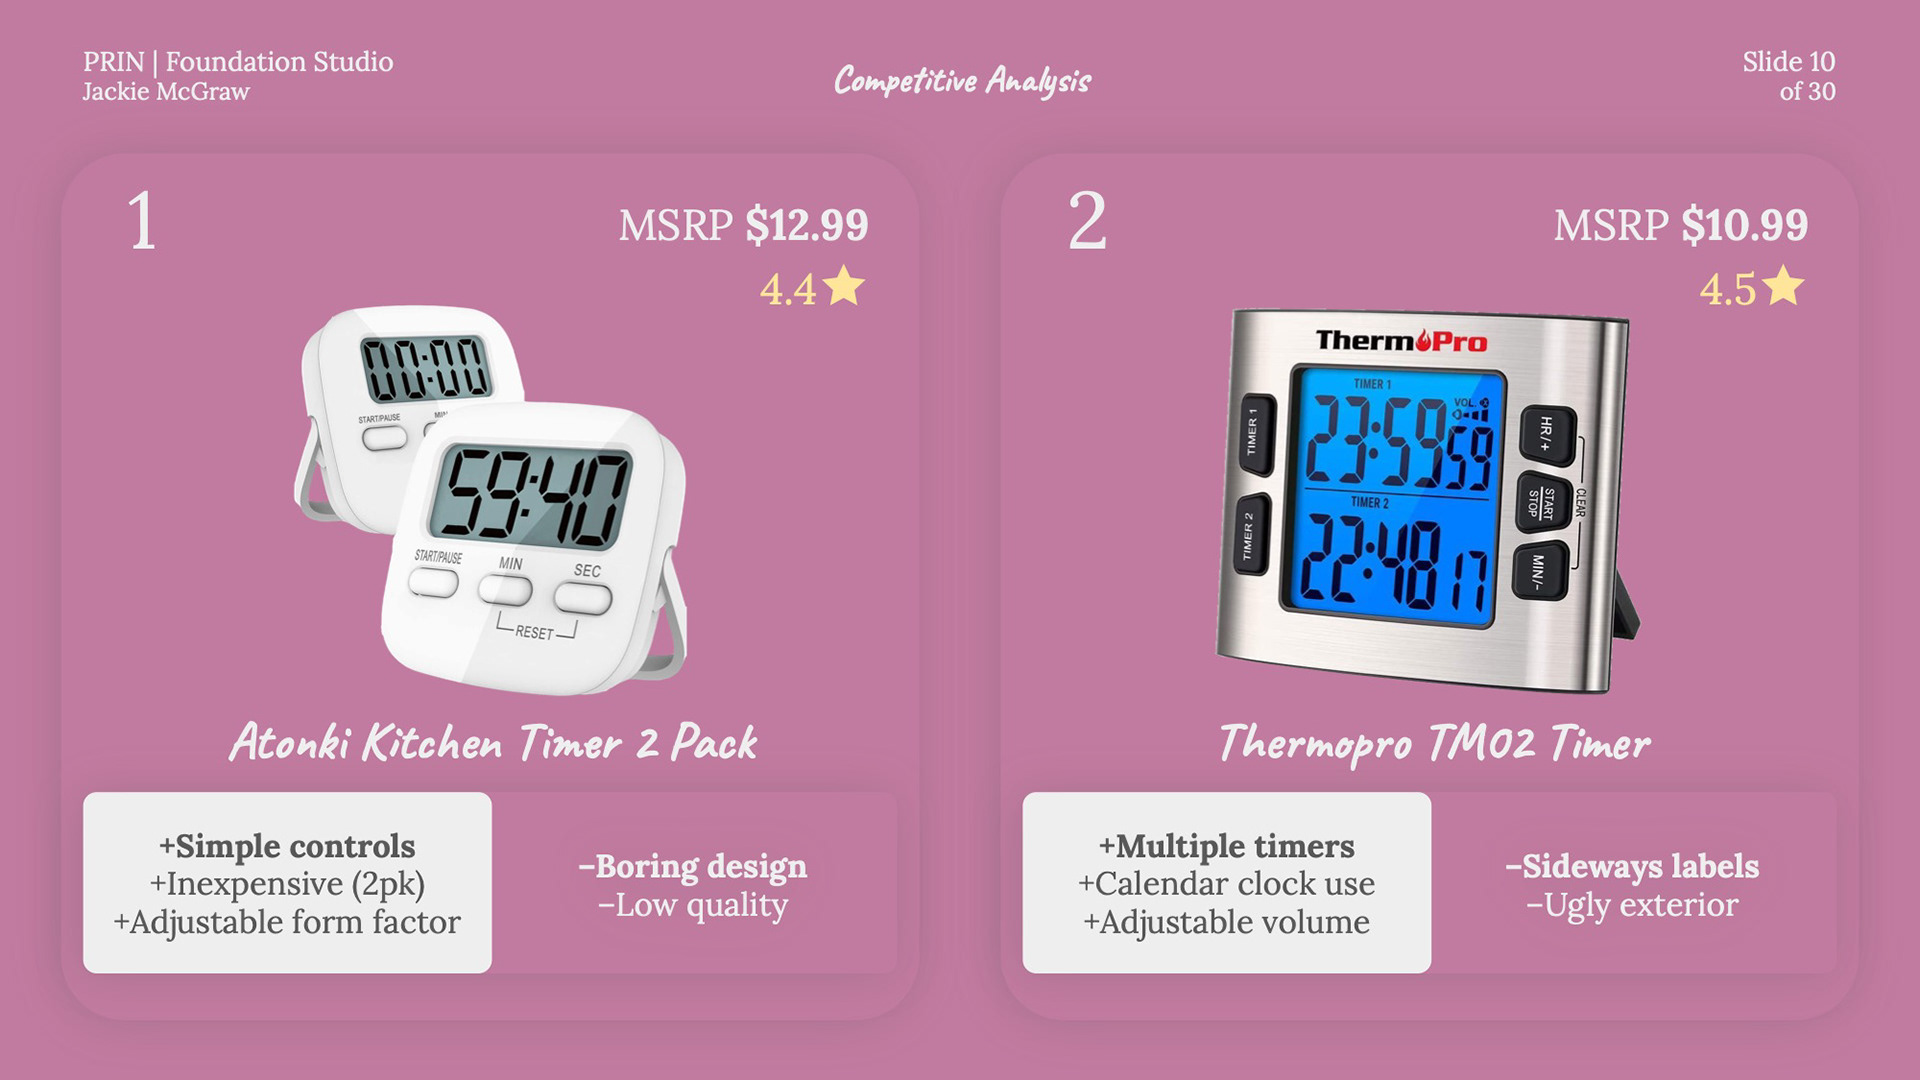
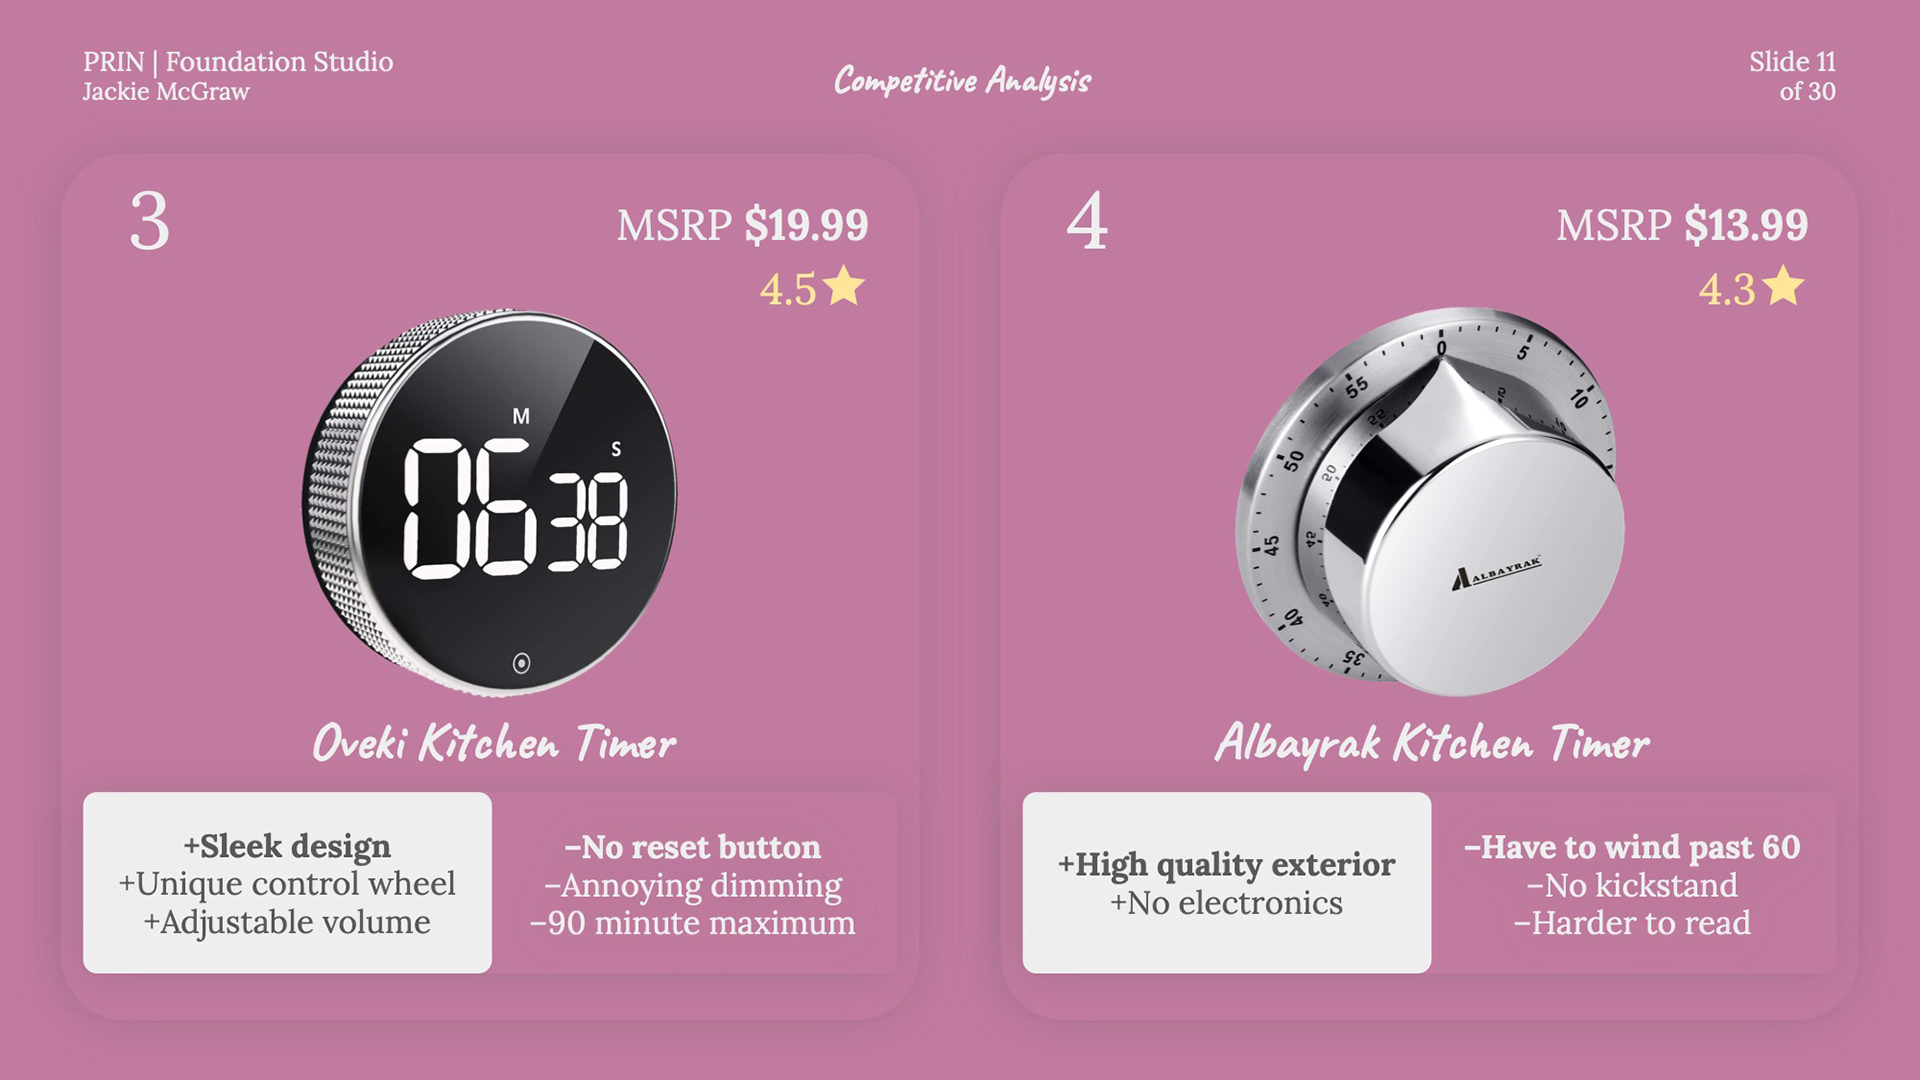
This boils down to a Blue ocean moment:
Timers with customizable features tend to be uglier than average.
Timers with customizable features tend to be uglier than average.
It's easier to spend on high-quality materials when you don’t have to deliver more functionality to the consumer—but doing both might make a product stand out.
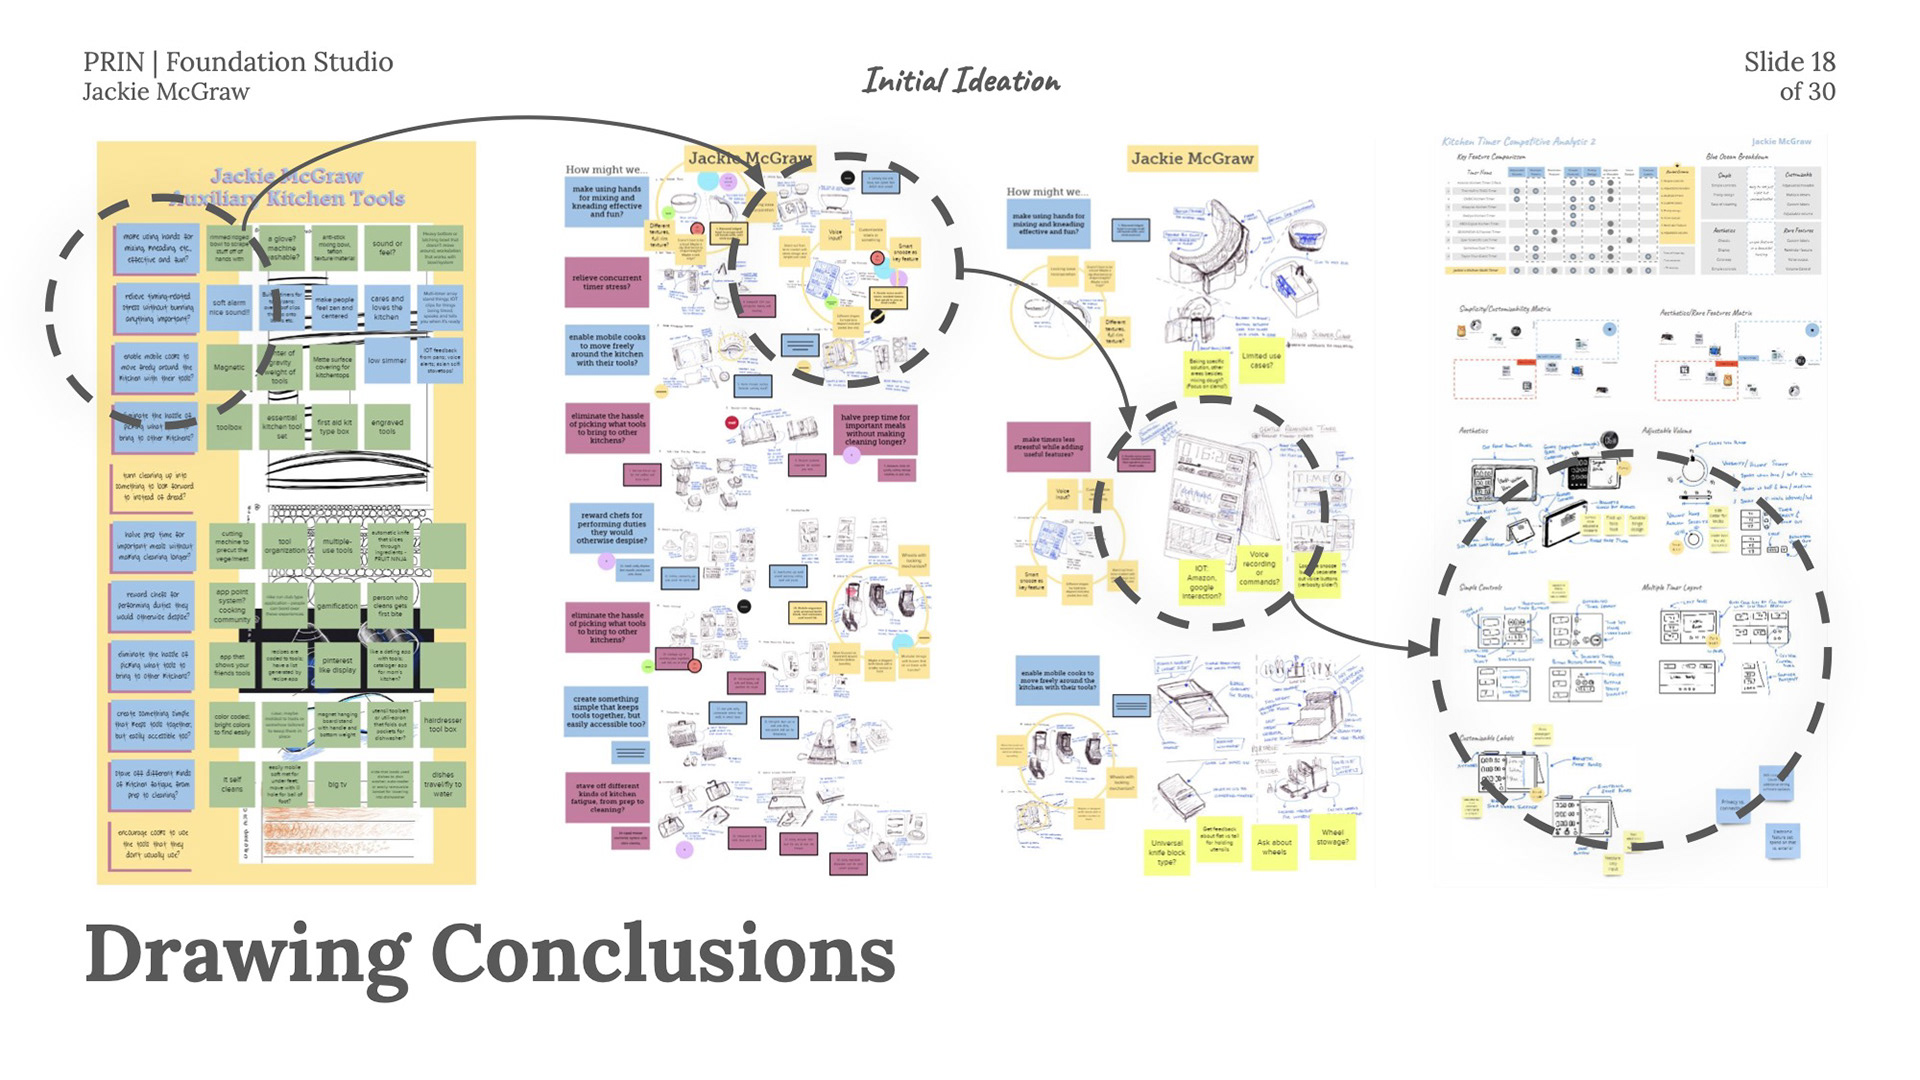
We began our ideation process by brainstorming many "how might we's." We illustrated some answers to those problem statements, before iterating on 3—and finally boiling down to one.
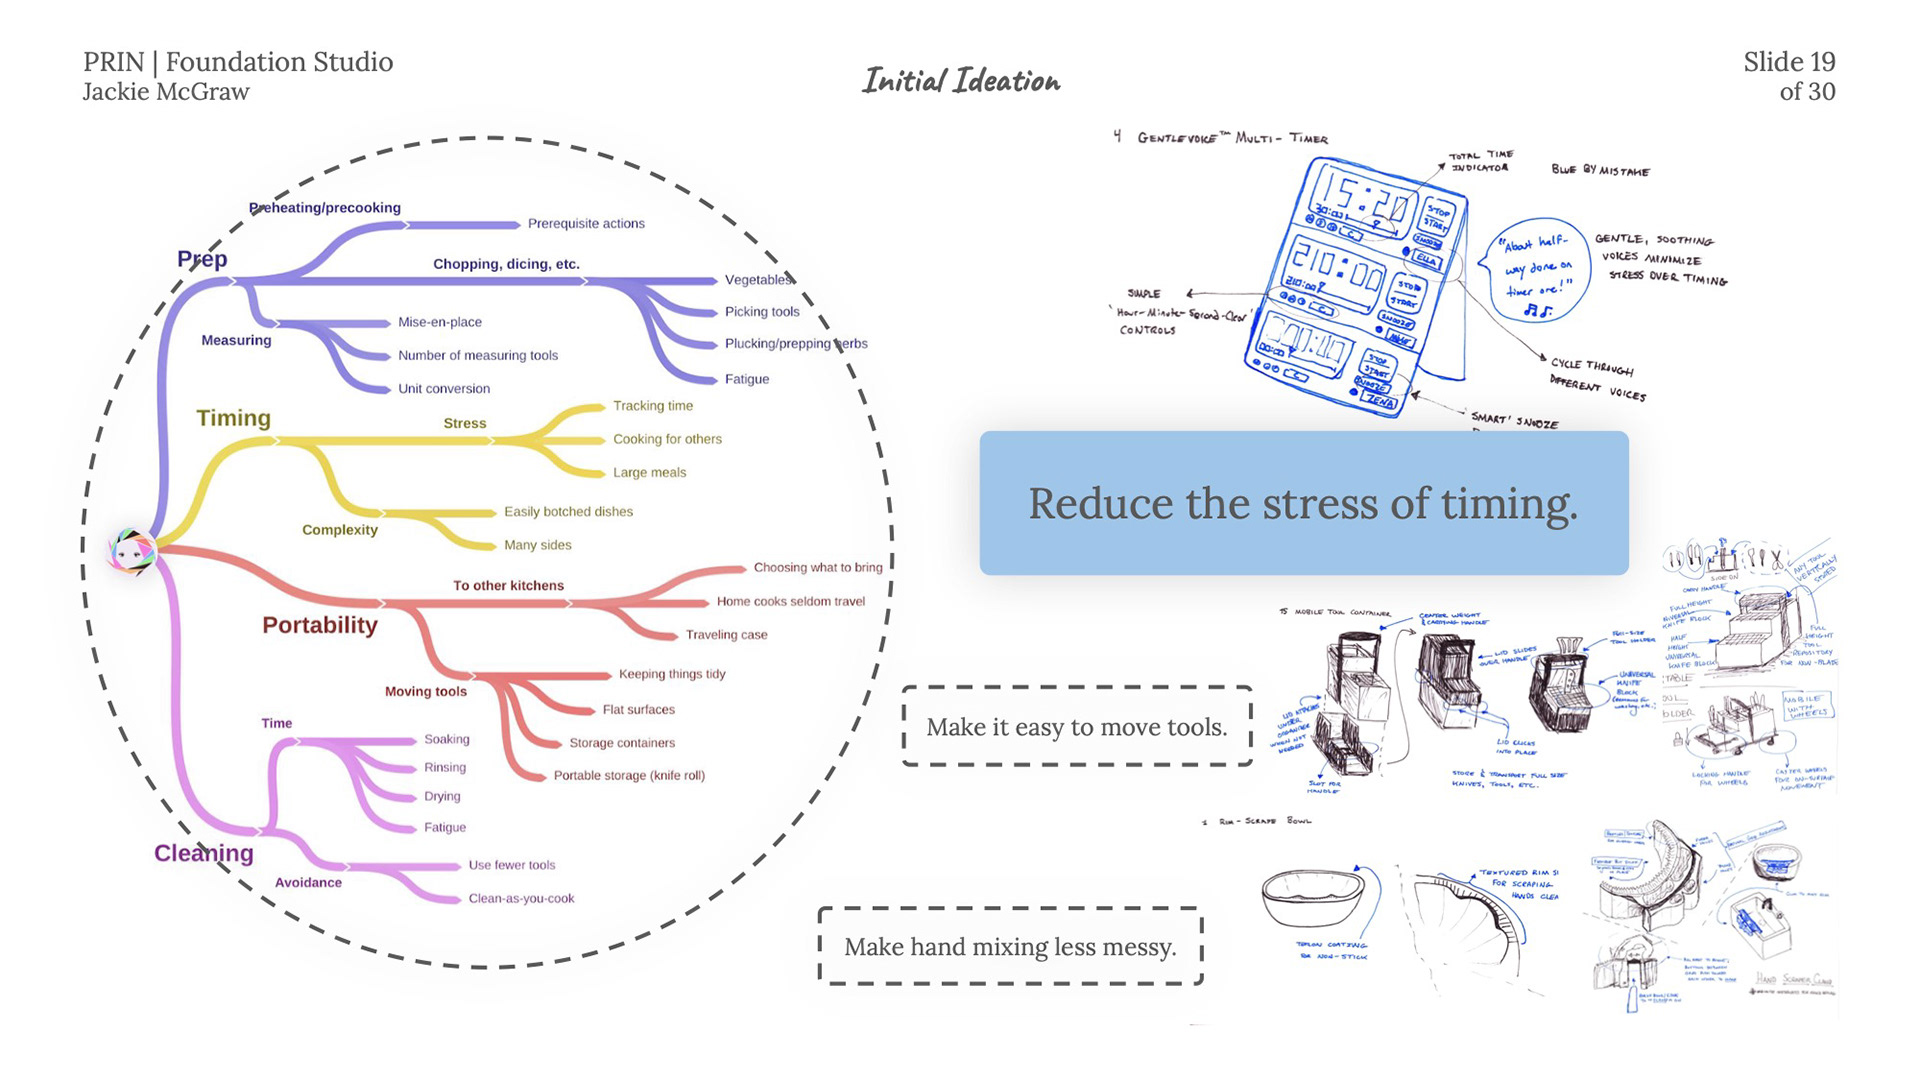
Food preparation, cleaning dishes, timing, and utensil portability were identified as key pain point areas shared by home cooks. But while other pain points only had some overlap among interviewees, every home cook I talked to is concerned with timing, because they try making new kinds of food or recipes fairly often.
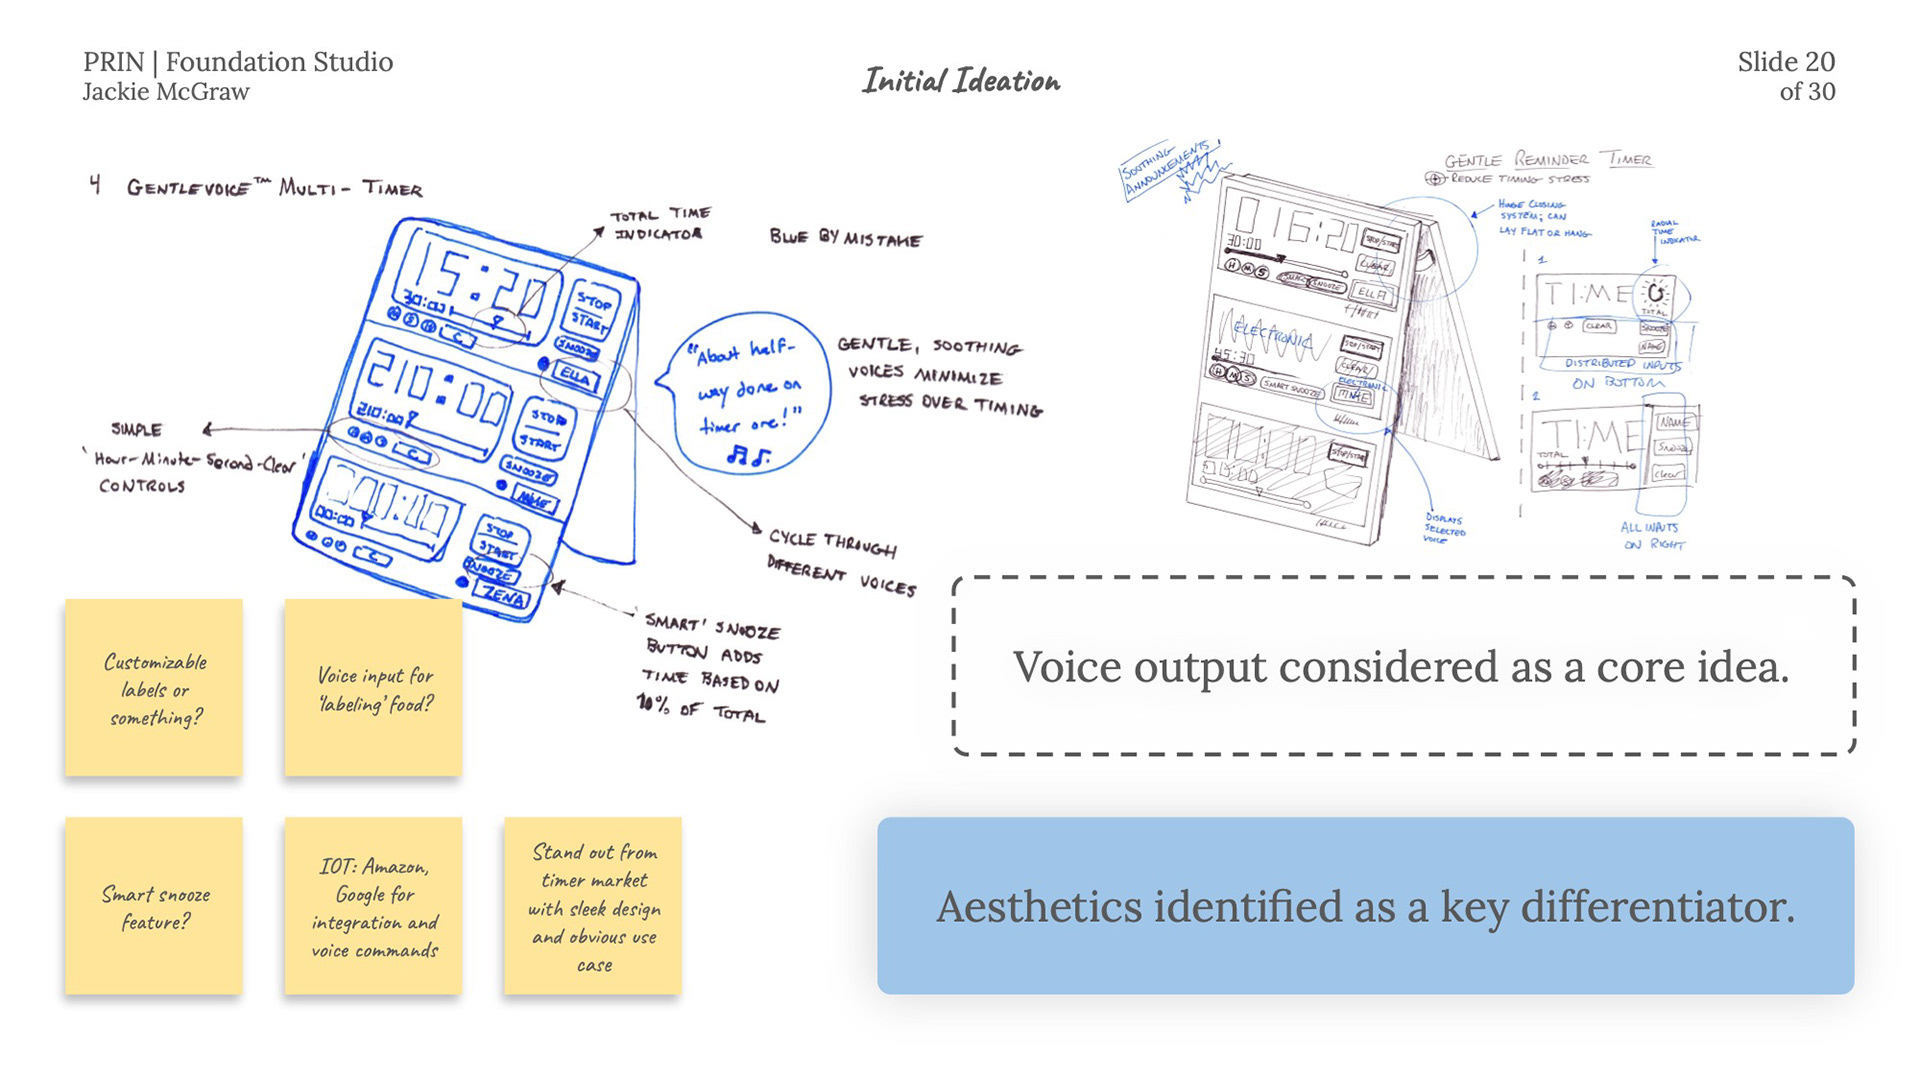
One early idea that captured my imagination was a timer that gently reminded you of its status instead of blaring an alarm. Another idea that got some traction among my peers was labeling timers with your own voice by recording the name of the item that corresponded with a timer.
I.O.T. functionality was also brought up in class, and that’s something I took to my home cooks—but time and time again, I was confronted by the need to keep my product simple and focused on a core experience valuable unto itself.
Aesthetics was a surprisingly rare differentiator in the kitchen timer space, so I knew my timer had to look better than the child of a beige CRT monitor and a calculator.
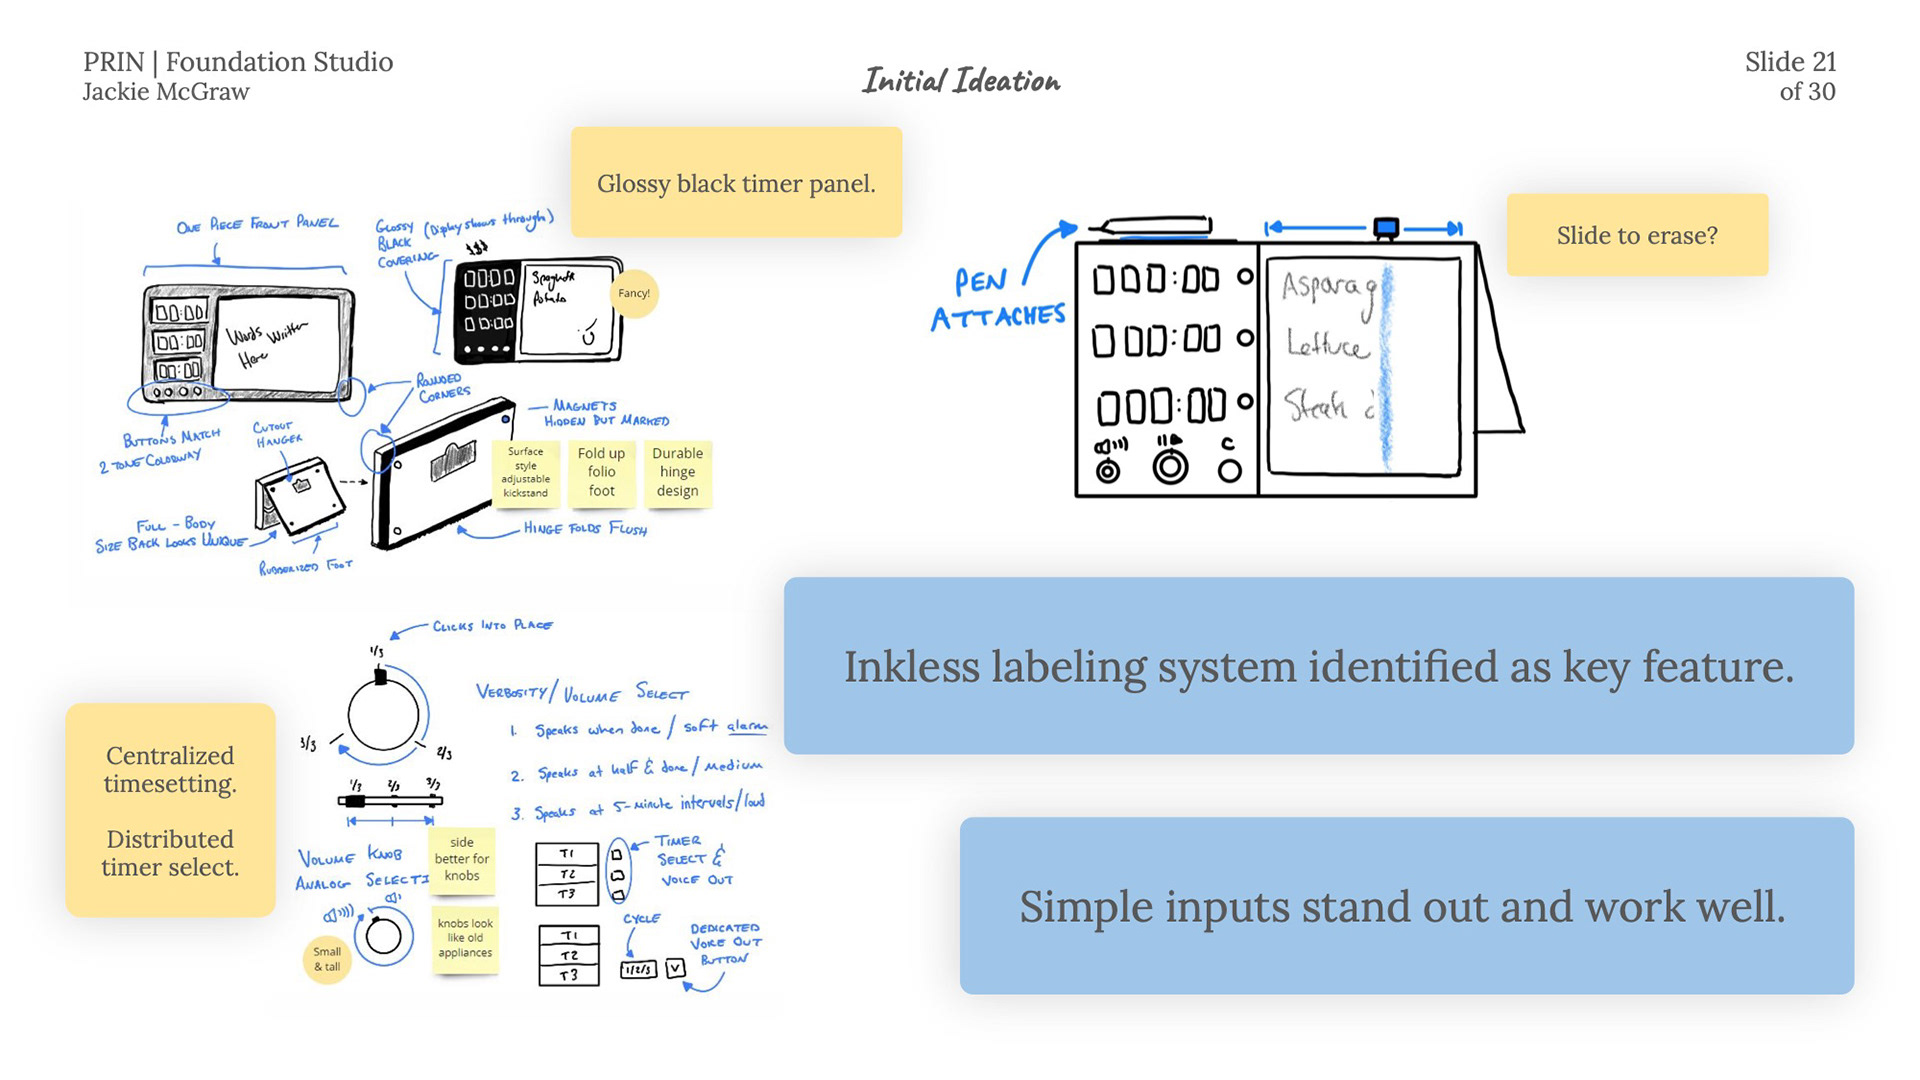
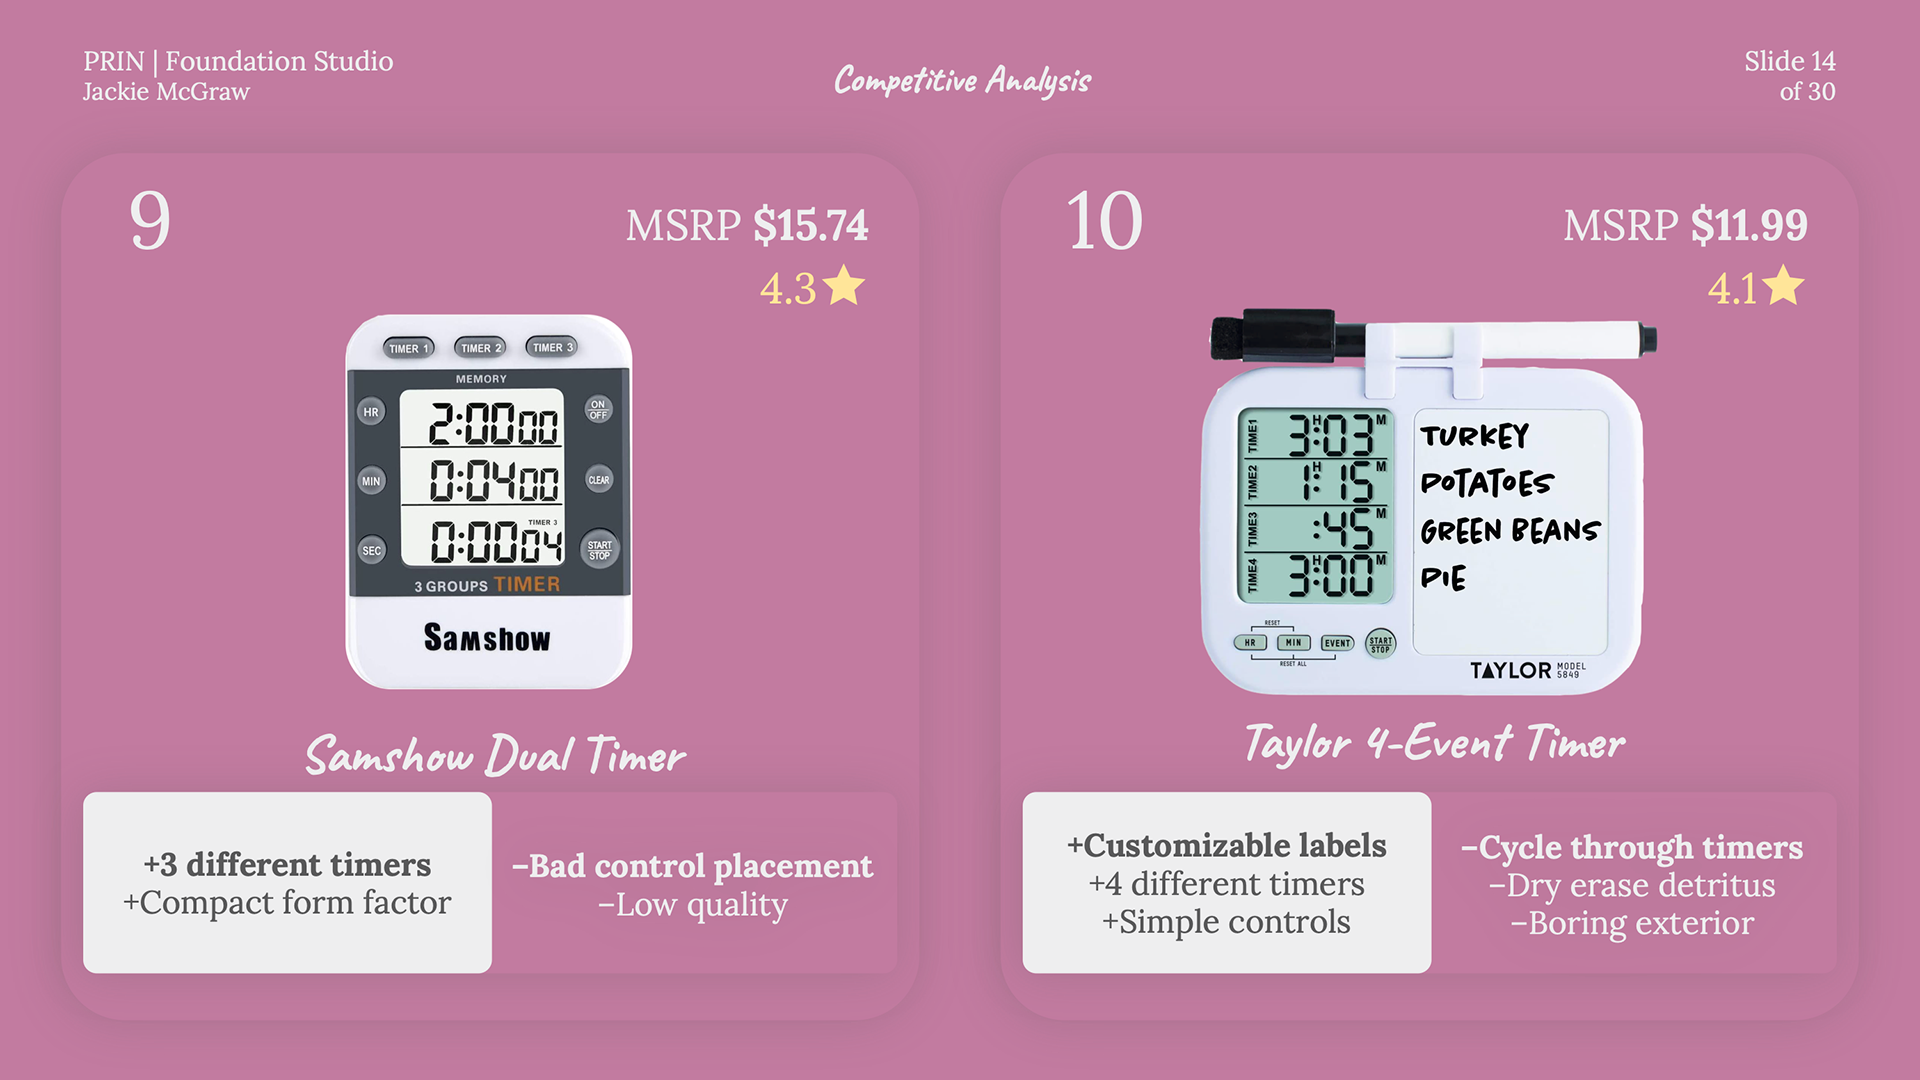
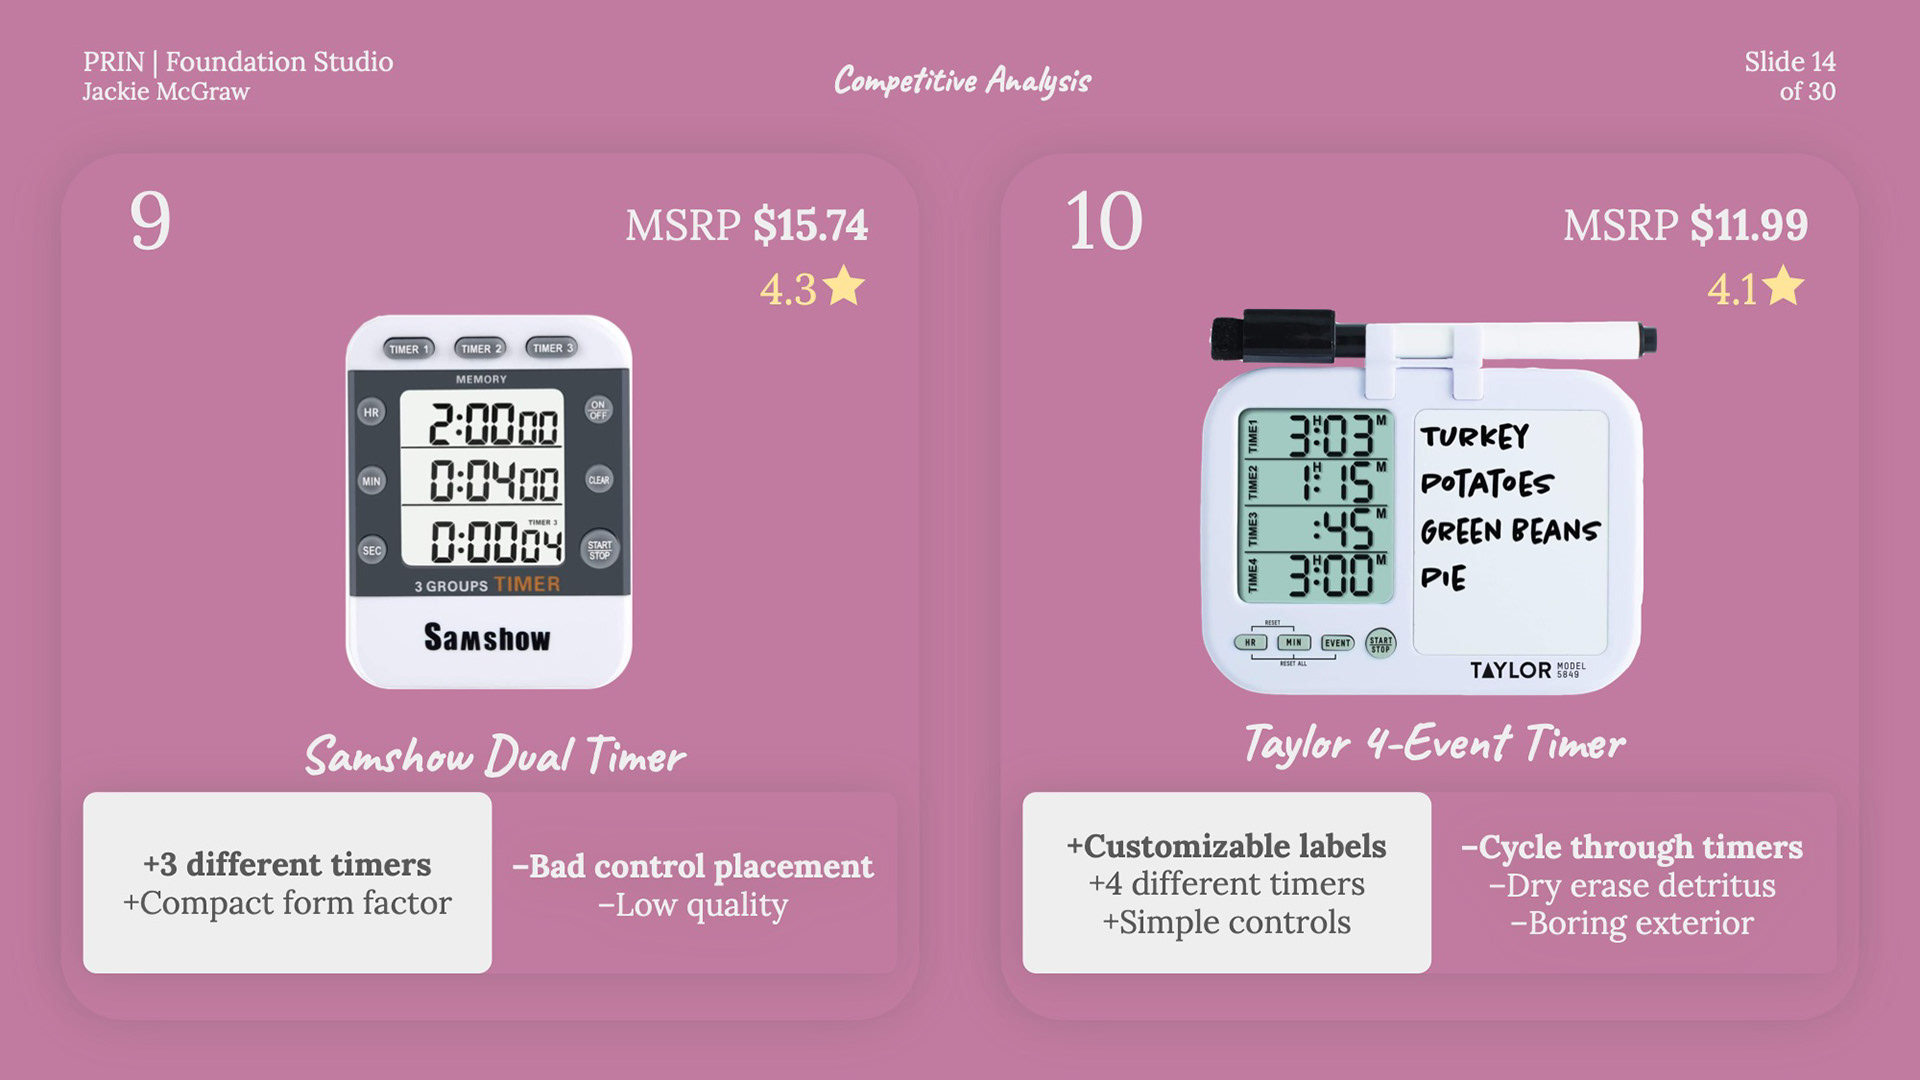
Clearly, the biggest opportunity is where the fewest competitors are operating. Surprisingly few timers on the market have a labeling system—that became the focus going forward because it really ties into the customization aspects of cooking that appeal to home cooks.
The initial design took inspiration from 'wind timers' with knobs. Using a dial to set the time allowed me to streamline the controls. Using a timer should be straightforward and efficient, and a single time-setting mechanism would minimize unnecessary buttons.
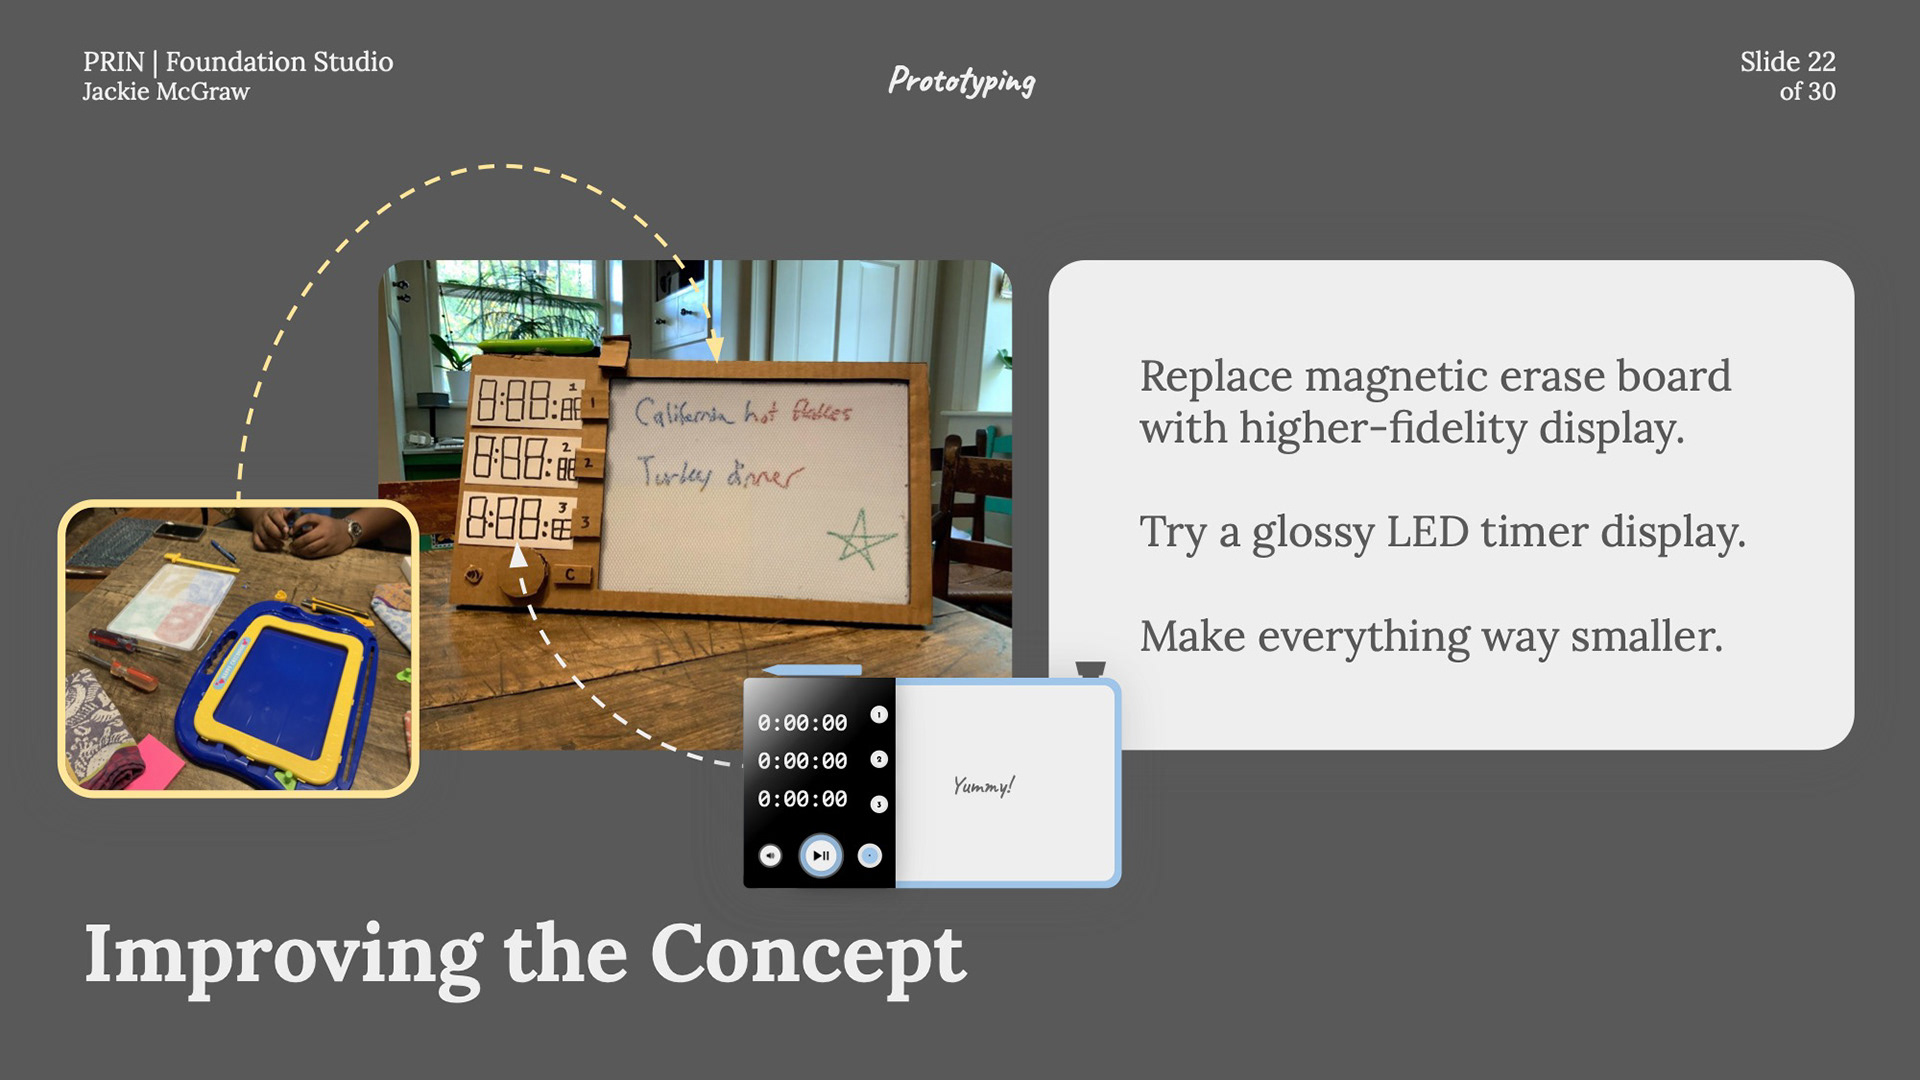
On to the prototyping and refinement process! I first made a low-fidelity prototype based around a slide-to-erase board, and the idea of a no-mess solution for labeling (as opposed to dry erase); as one interviewee said, writing is the “ultimate customization!”
IYA graciously shipped us maker-kits with cardboard and glue. I purchased magnets to attach the pen you see, and I can confirm how satisfying it is to reattach the stylus to the top of even something as frumpy as this big cardboard model.
Feedback for this first round included: looking into alternative writing technology that had a higher resolution compared to blurry iron filings, adding a glossy panel portion with white LEDs to up the beauty ante, and of course, making the product timer sized.
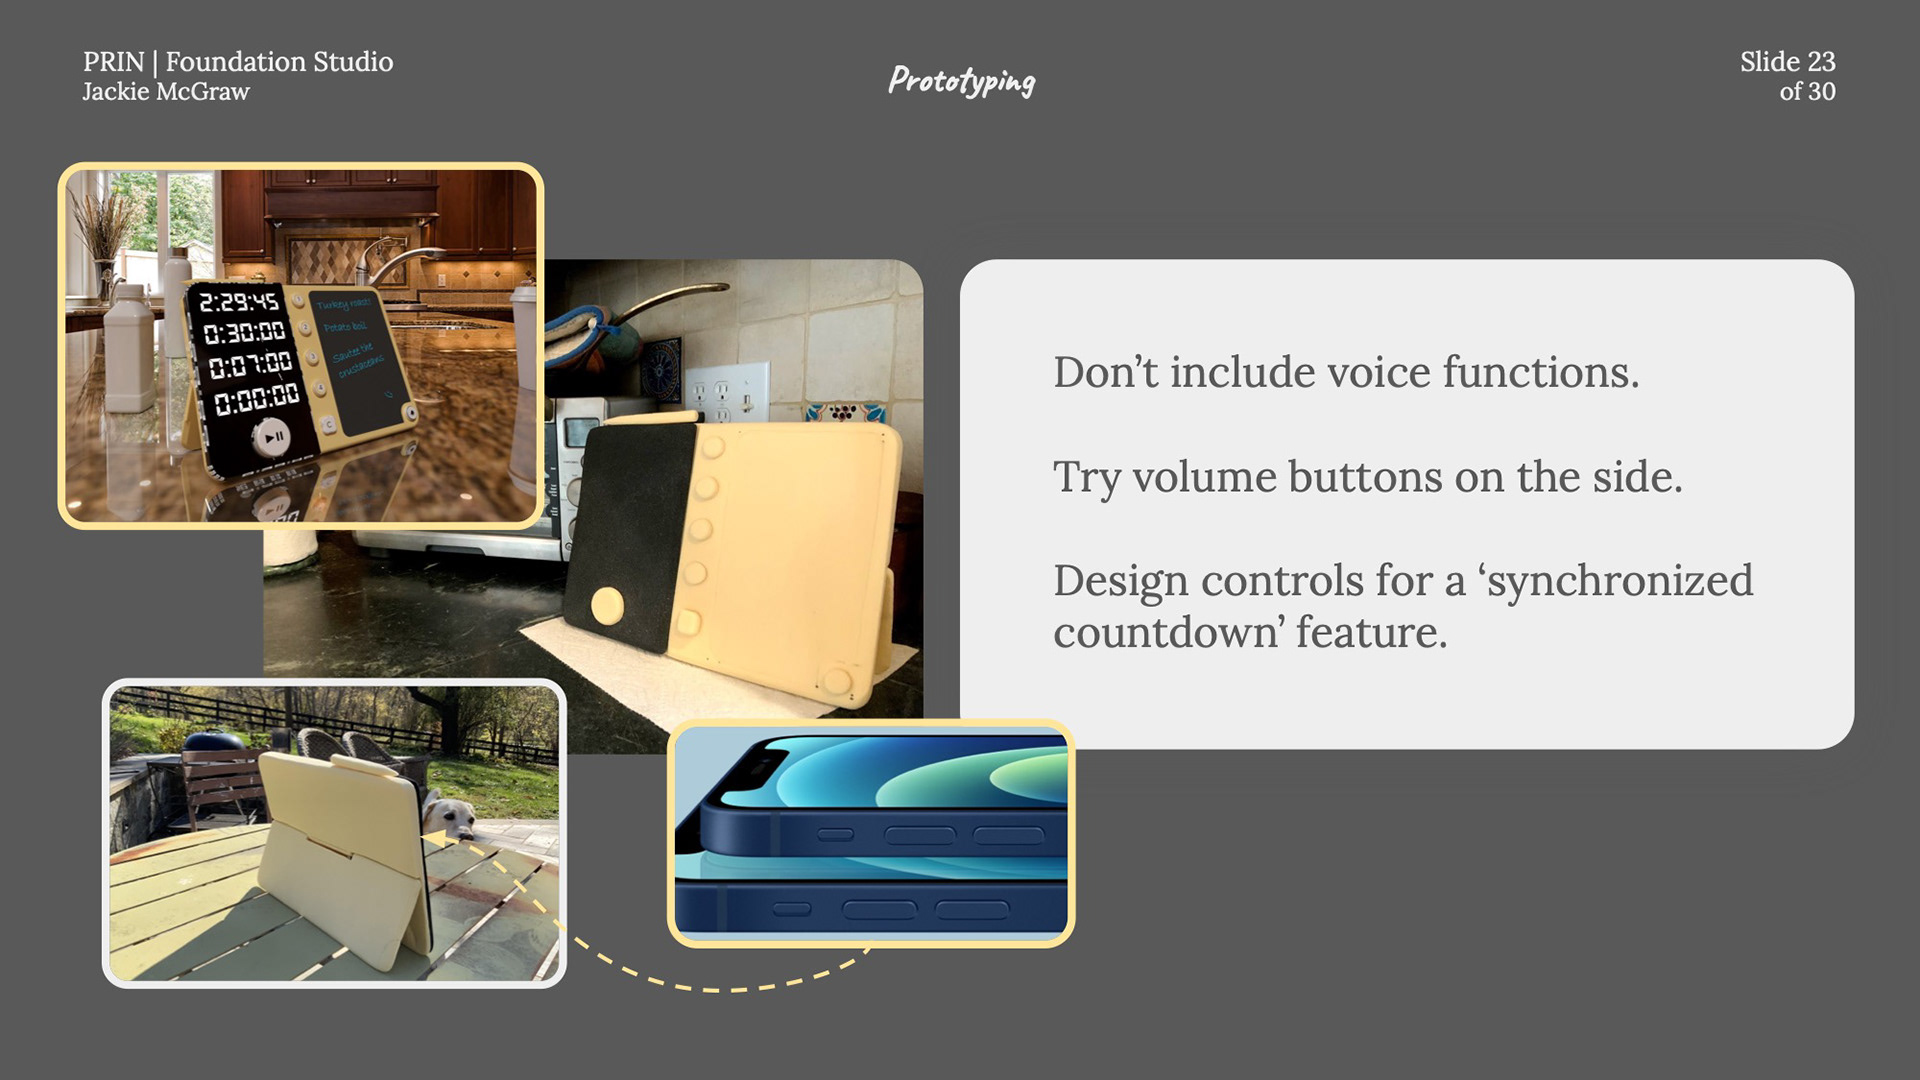
Later in the process we were shipped foam. I spent an afternoon carving and sanding a smaller medium-fidelity prototype that included space for an LCD pressure display—thanks for the suggestion, Bansini! This coincided with a 3D model that I designed in Shapr3D on my iPad and rendered in Adobe Dimension.
Further interviews with my gaggle of home cooks focused on form and possible additional features like wireless connectivity and voice functionality. While notifications and remote setting would be useful, some interviewees say they would “never” buy a timer with voice input—and some think voice output is "creepy." One home cook brought up the fact that not everyone has a smartphone—that’s a great point, and it ties into the idea that a great timer should work as a standalone device. The cooks also helped refine the volume controls and interaction scheme toward their final forms.
Professor Grant had a great idea that tied into the home cooking aspect of the product in a really deep way: a timer mode that tells you when to start another part of the cooking process so that everything is done at the same time.
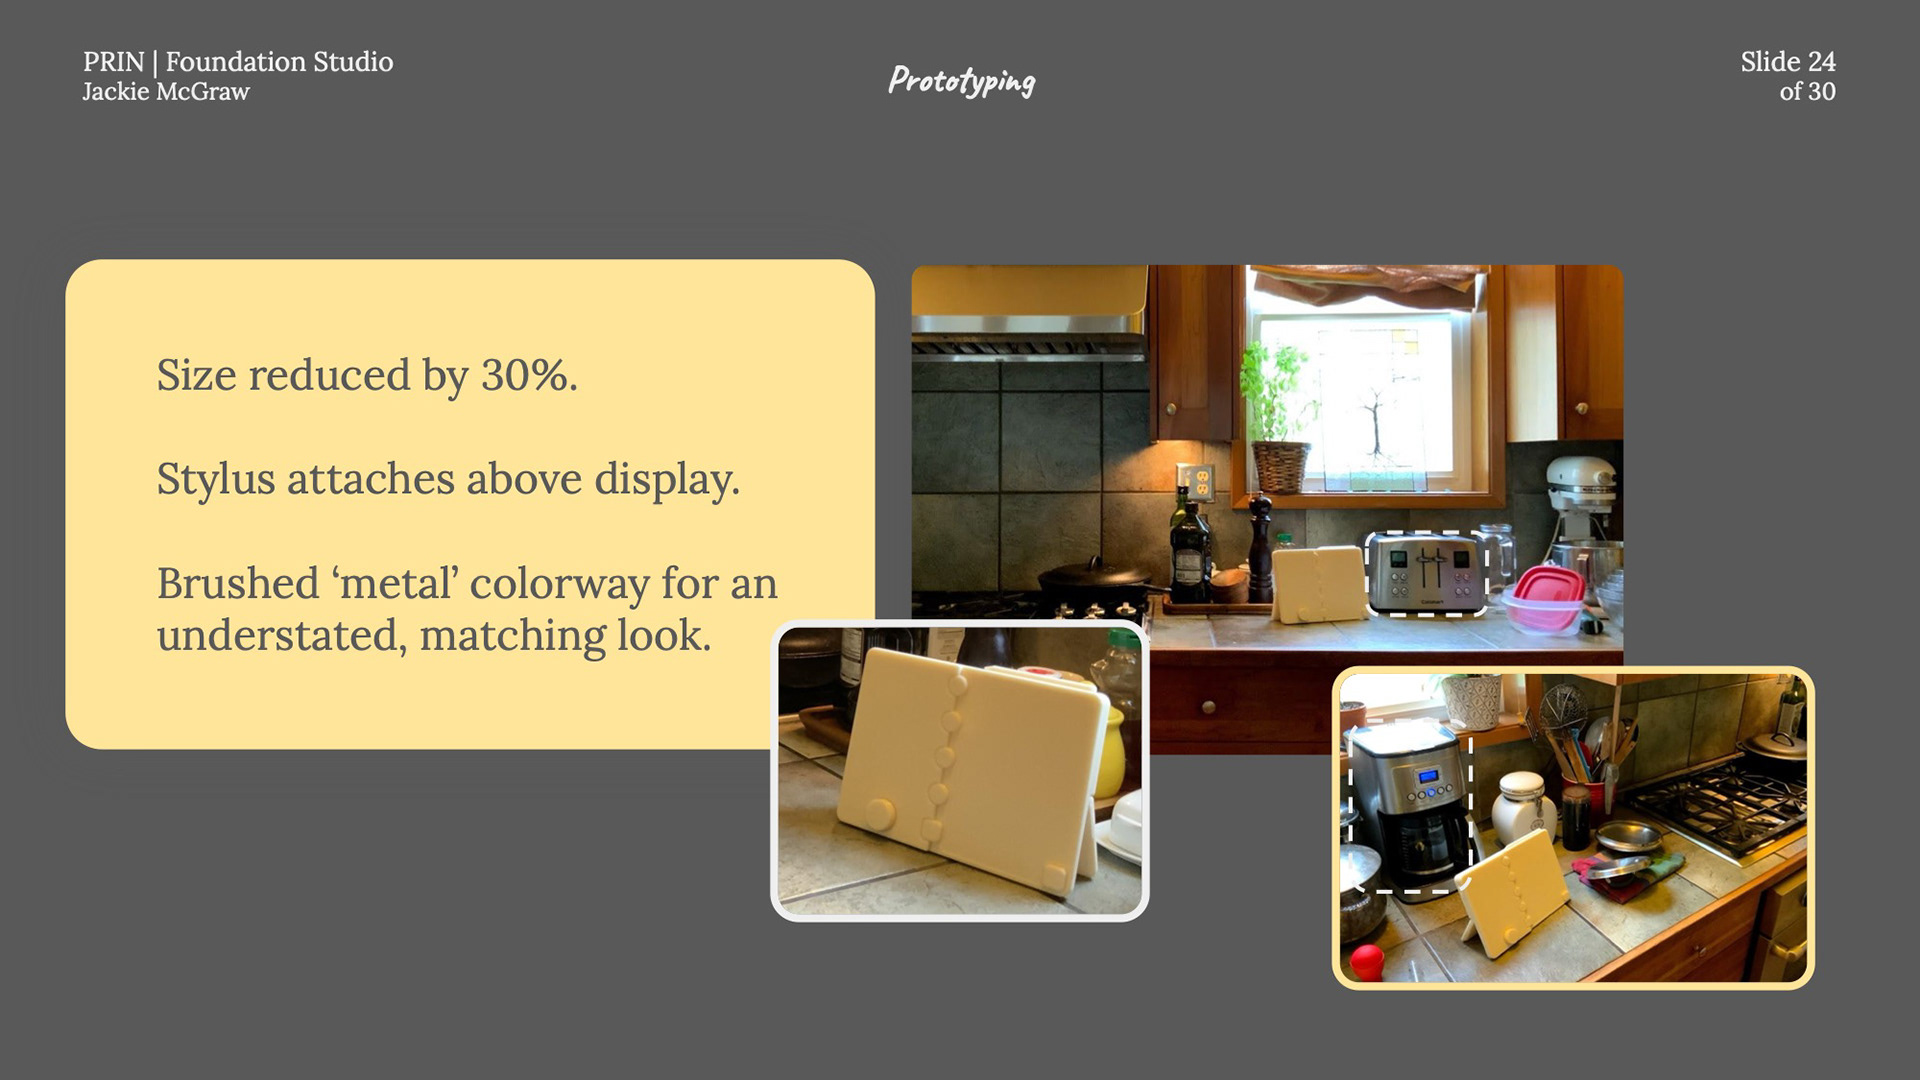
With the makerspace at the Iovine and Young Academy at our disposal, I had the final iteration of my 3D model printed as a final proof of concept for the size and physicality of my timer.
The size of this higher fidelity prototype is 30% smaller than the previous iteration (which some cooks had said was just a tad too big). Also, the stylus was moved above the writing display, and the body shifted from a colored plastic look toward something that won’t stand out too much in any kitchen: brushed chrome.
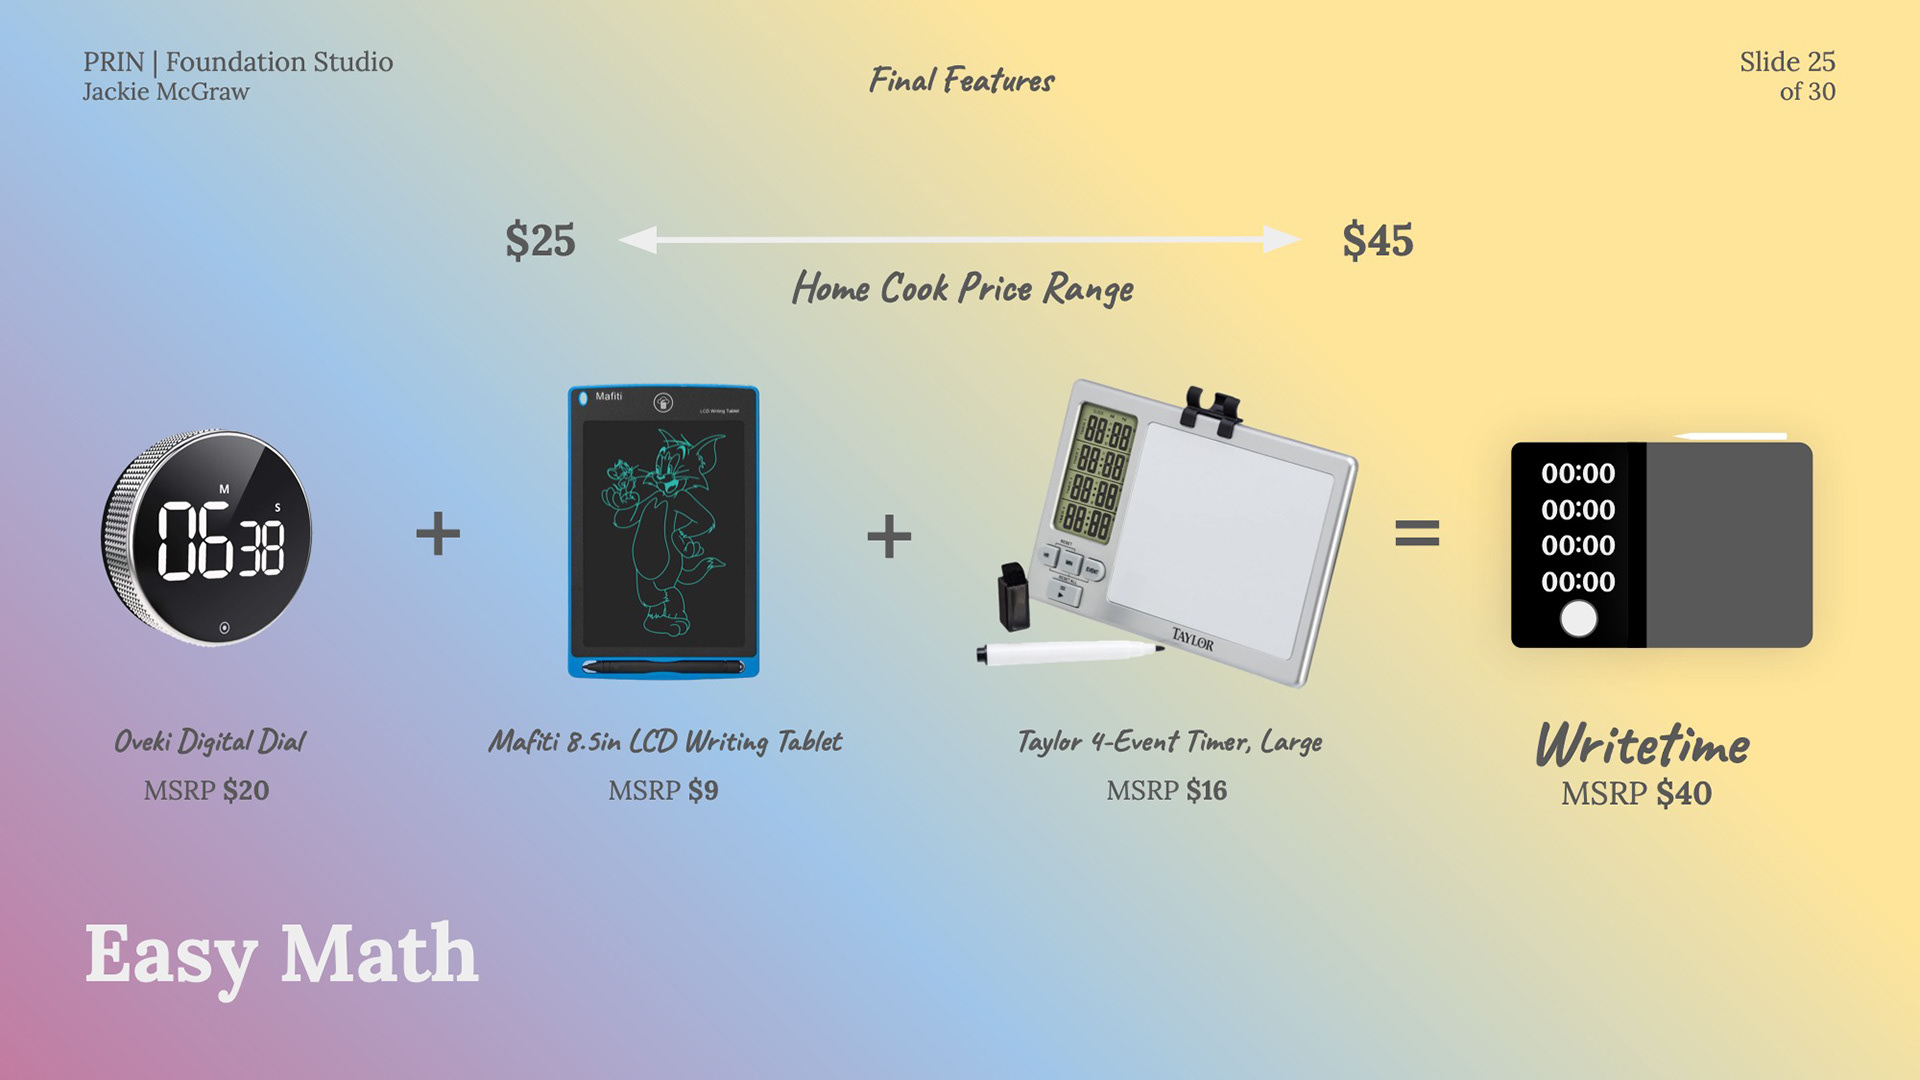
In one of the later rounds of interviews, I gathered price ranges from my home cook squad, and found some overlap between 25 and 45 dollars. Looking at some of the constituent ‘parts’ from other products, I am confident that my timer could be sold for $40.
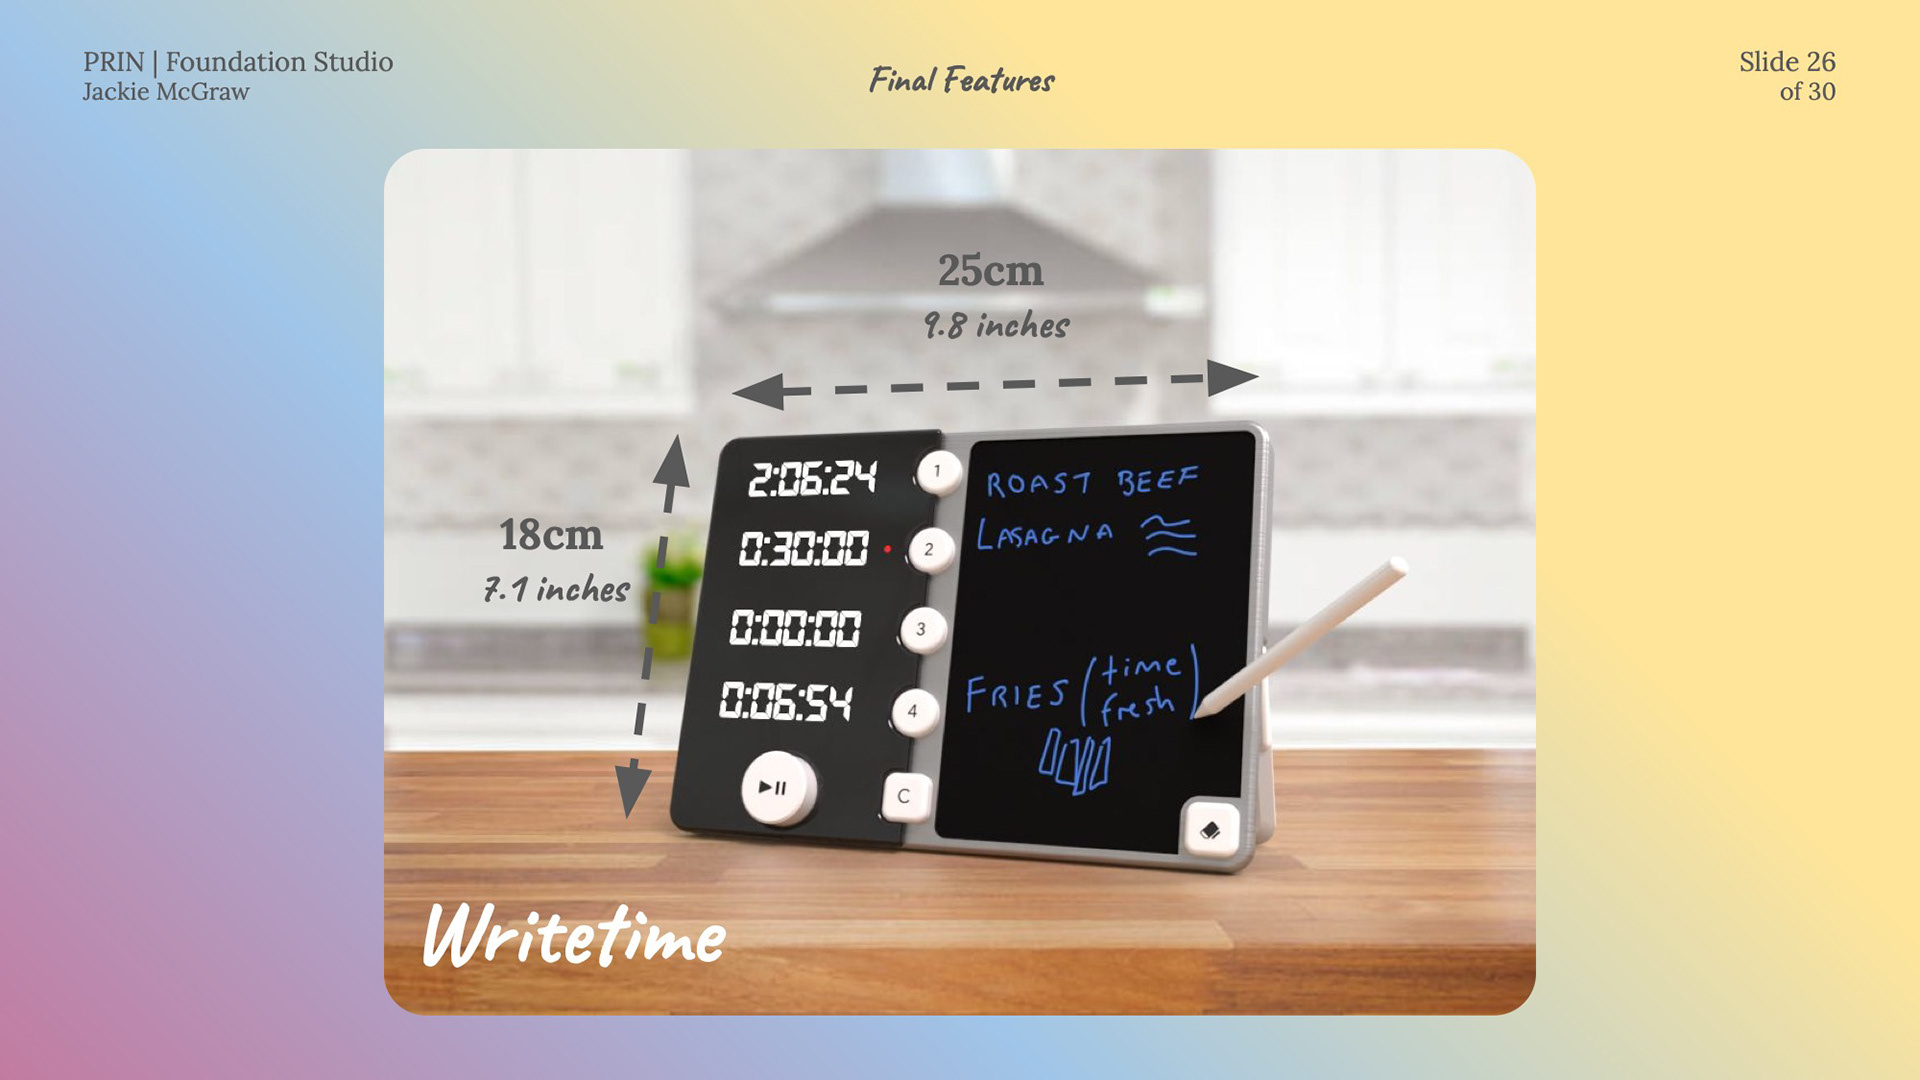
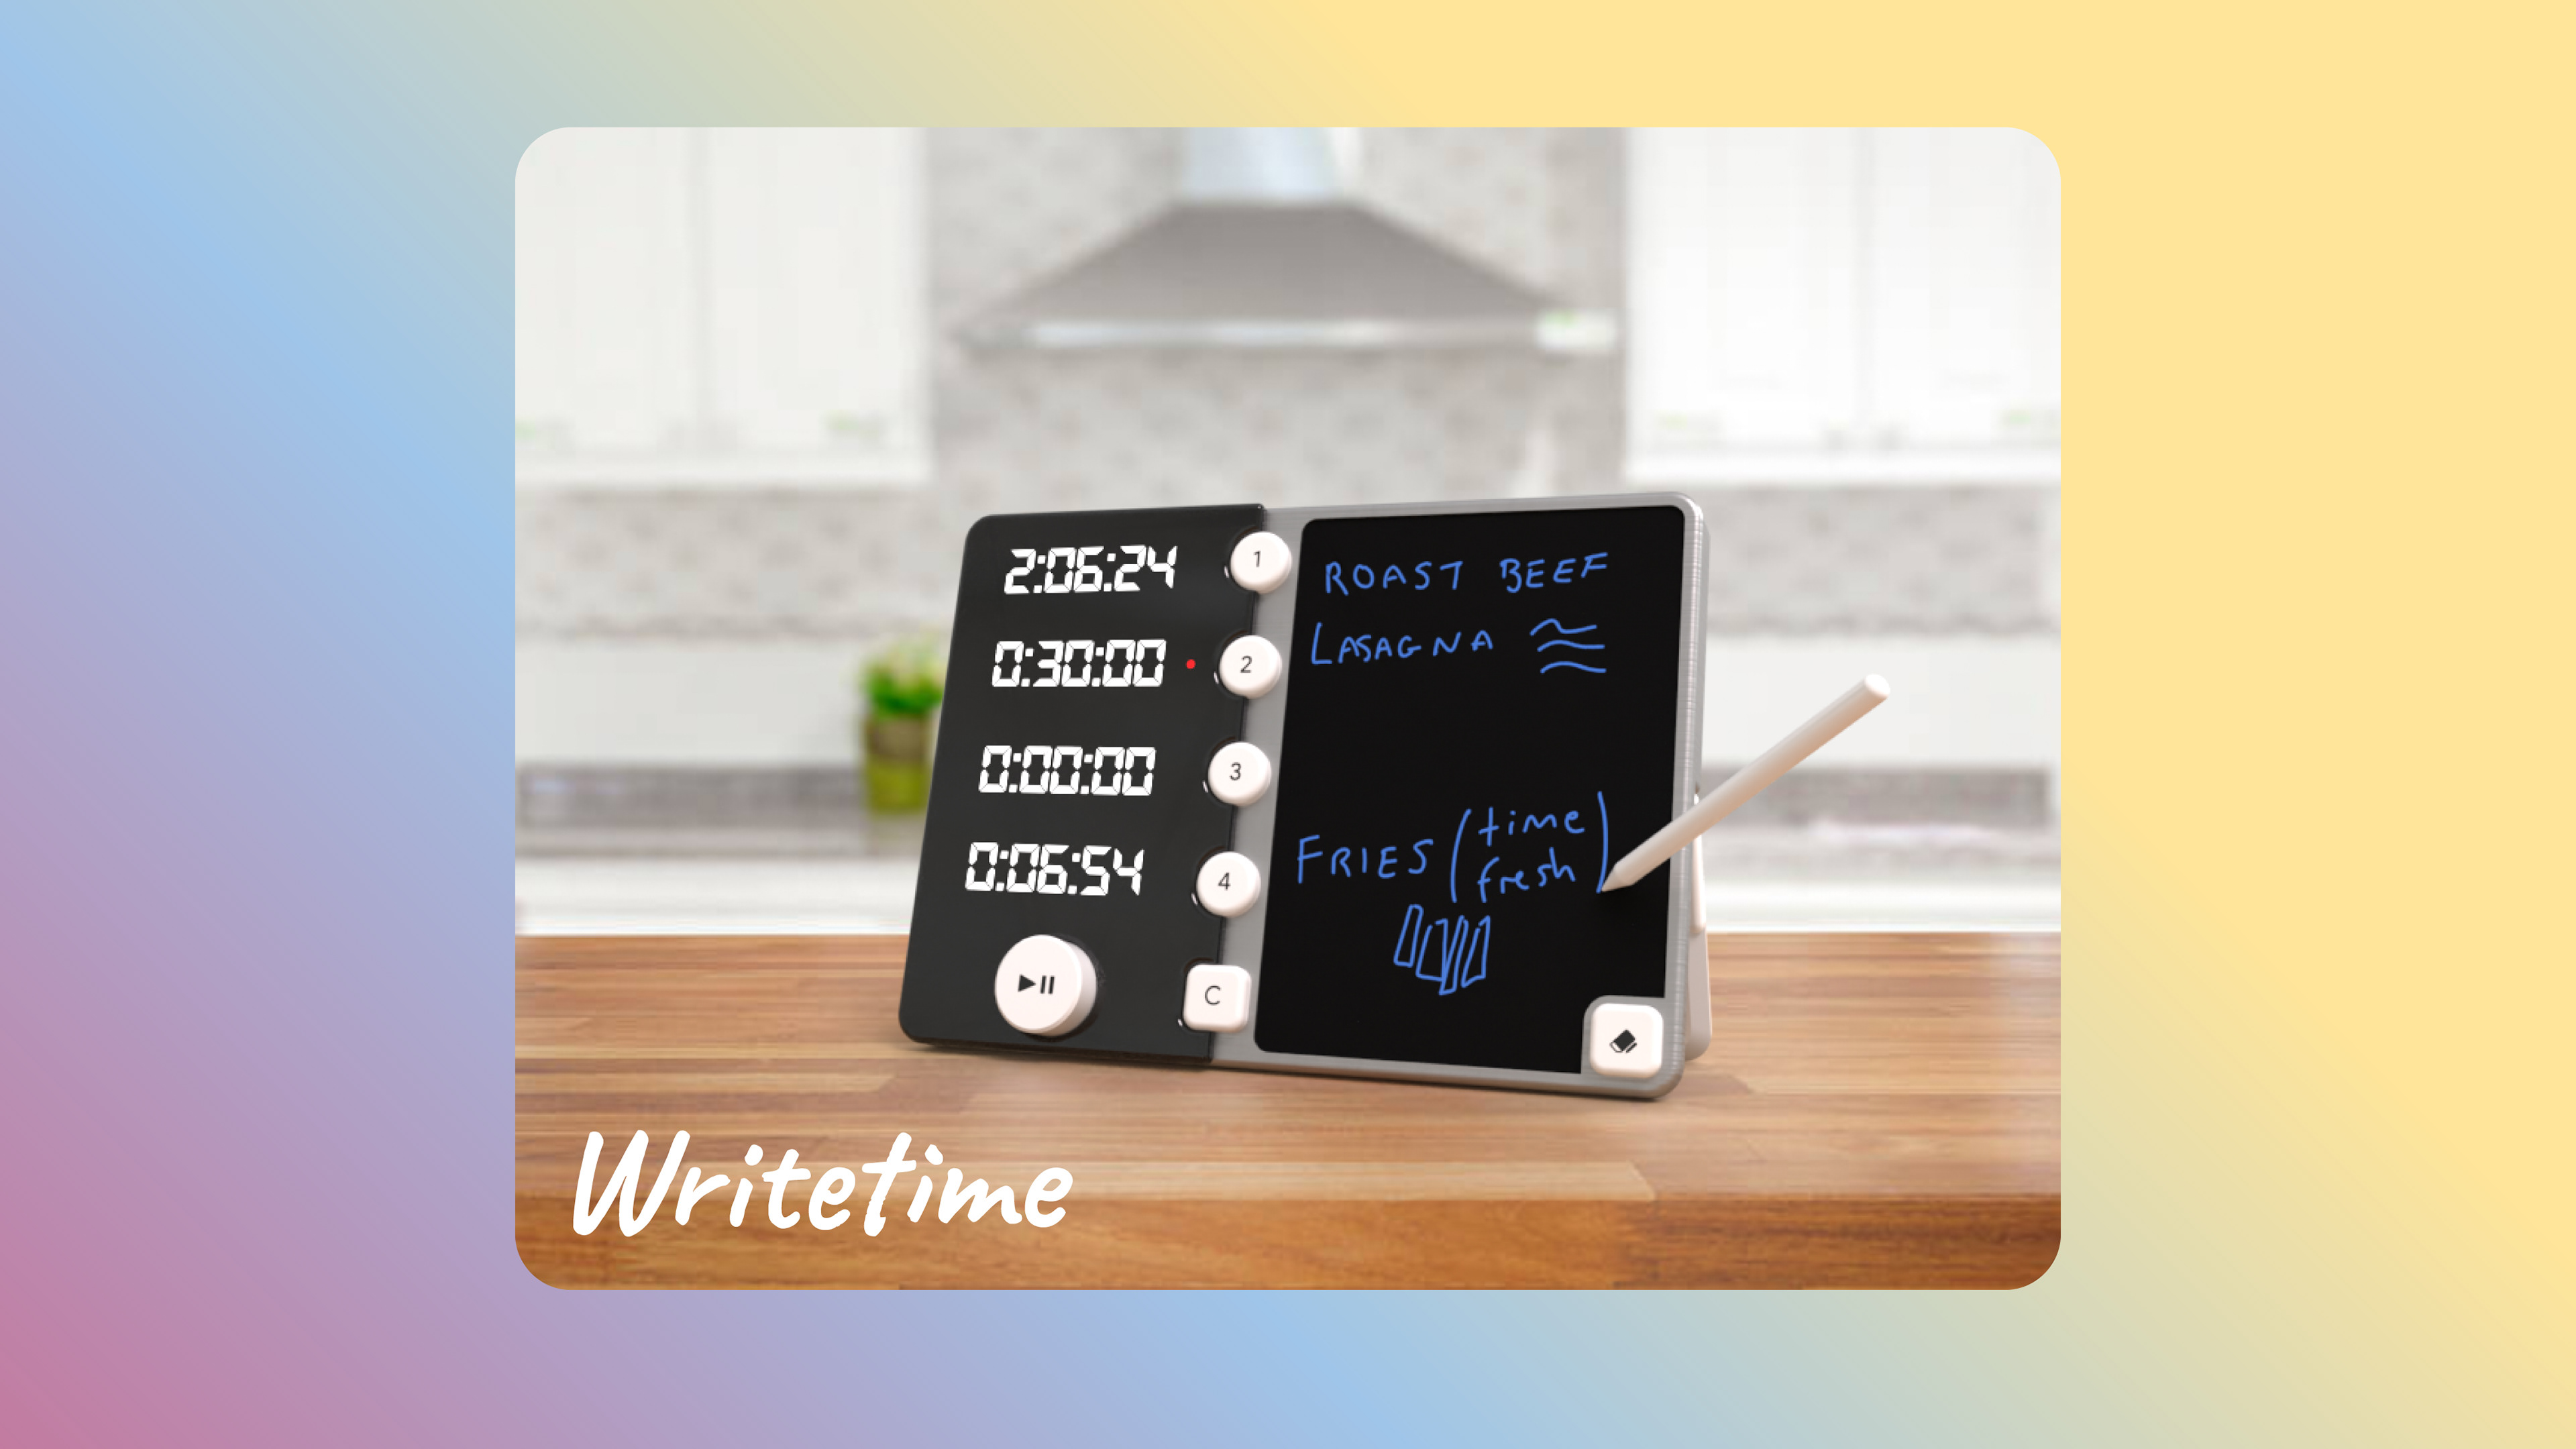
This is Writetime, a kitchen multi-timer that’s portable, pretty, and simple to use—great for experimenting with new dishes, and bringing culinary creativity to life.
The chassis is 25 centimeters long and 18cm tall, making it a great size for picking up and writing on it, delivering multi timer functionality without taking up too much counter space, and allowing for drawer storage. Let’s take a look at some features!
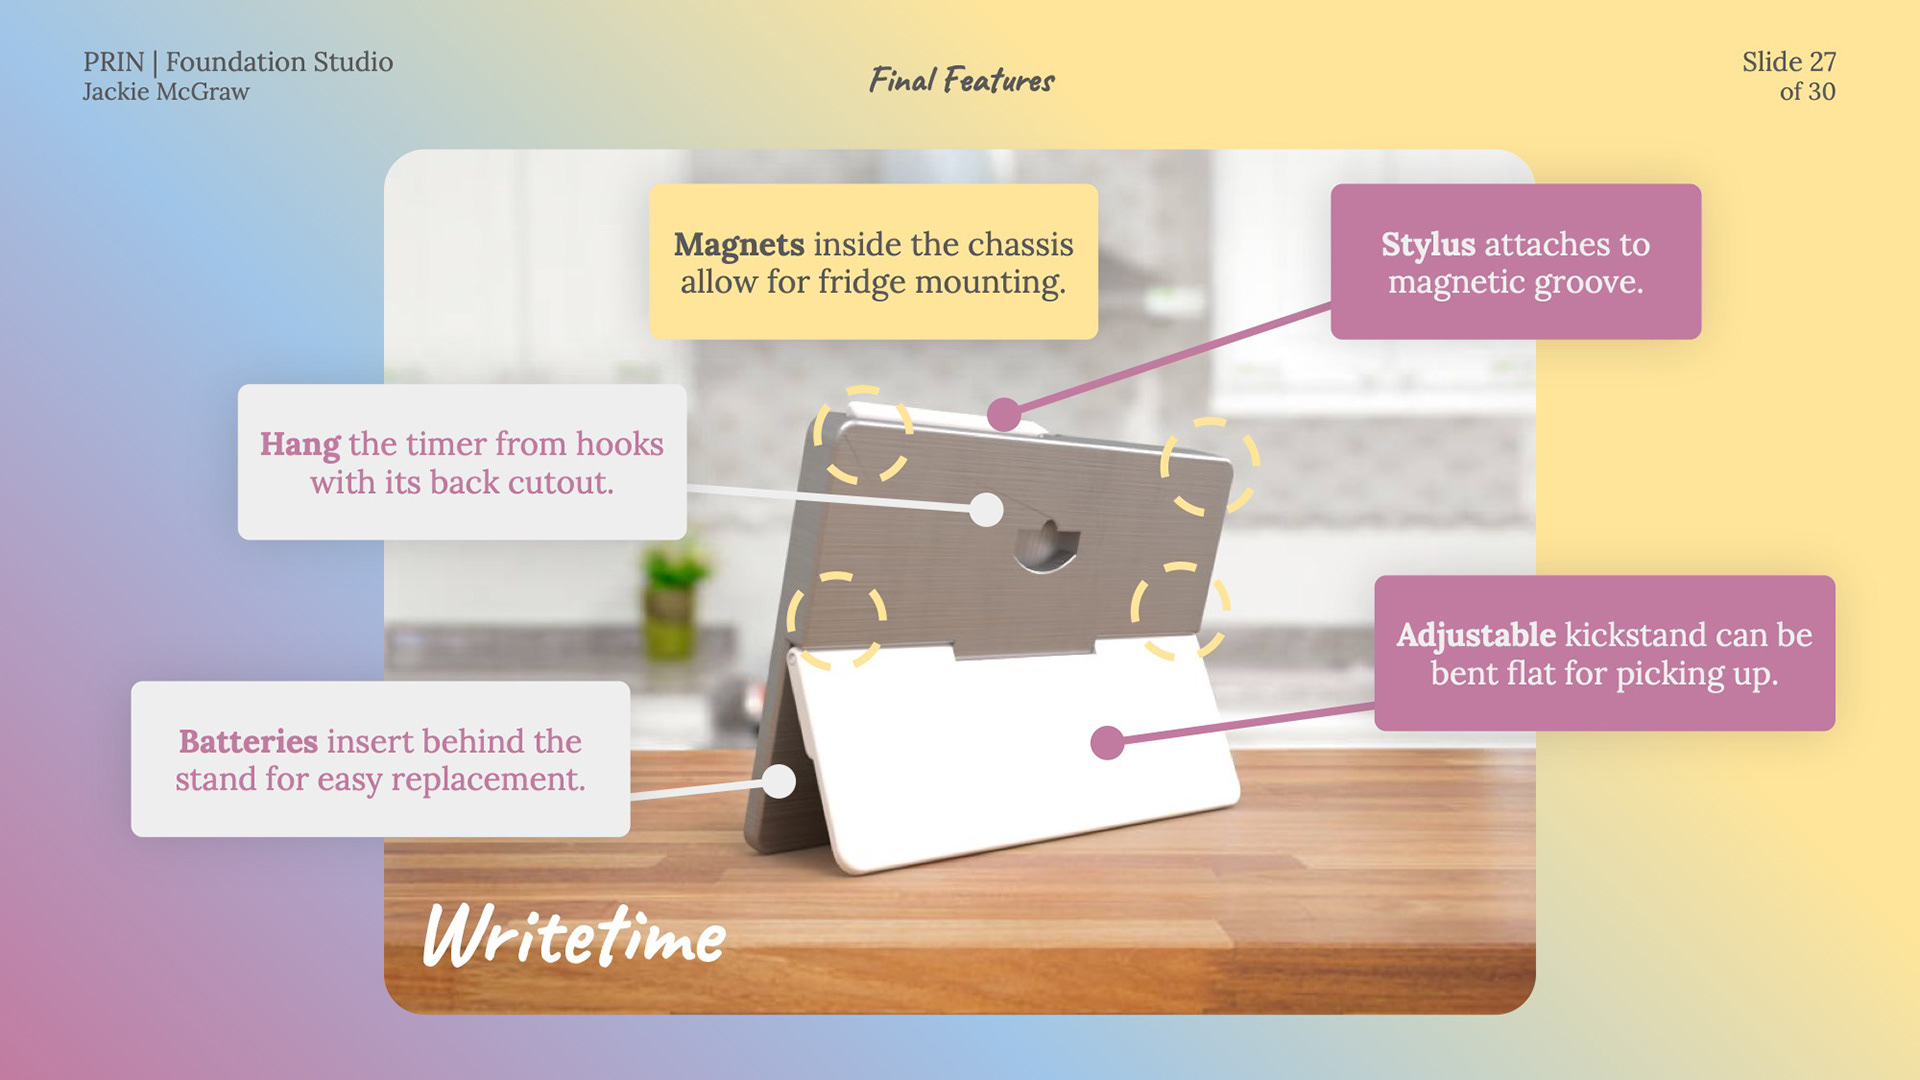
Let’s start with the back. Writetime can be hung by a peg, and adjusted to stand at various angles depending on your use case with its kickstand. It takes common consumer batteries to avoid having to recharge it, and features a magnetically attaching stylus that’s always where you need it.
And of course, there are magnets inside the top part of the back panel so it can attach to your refrigerator.
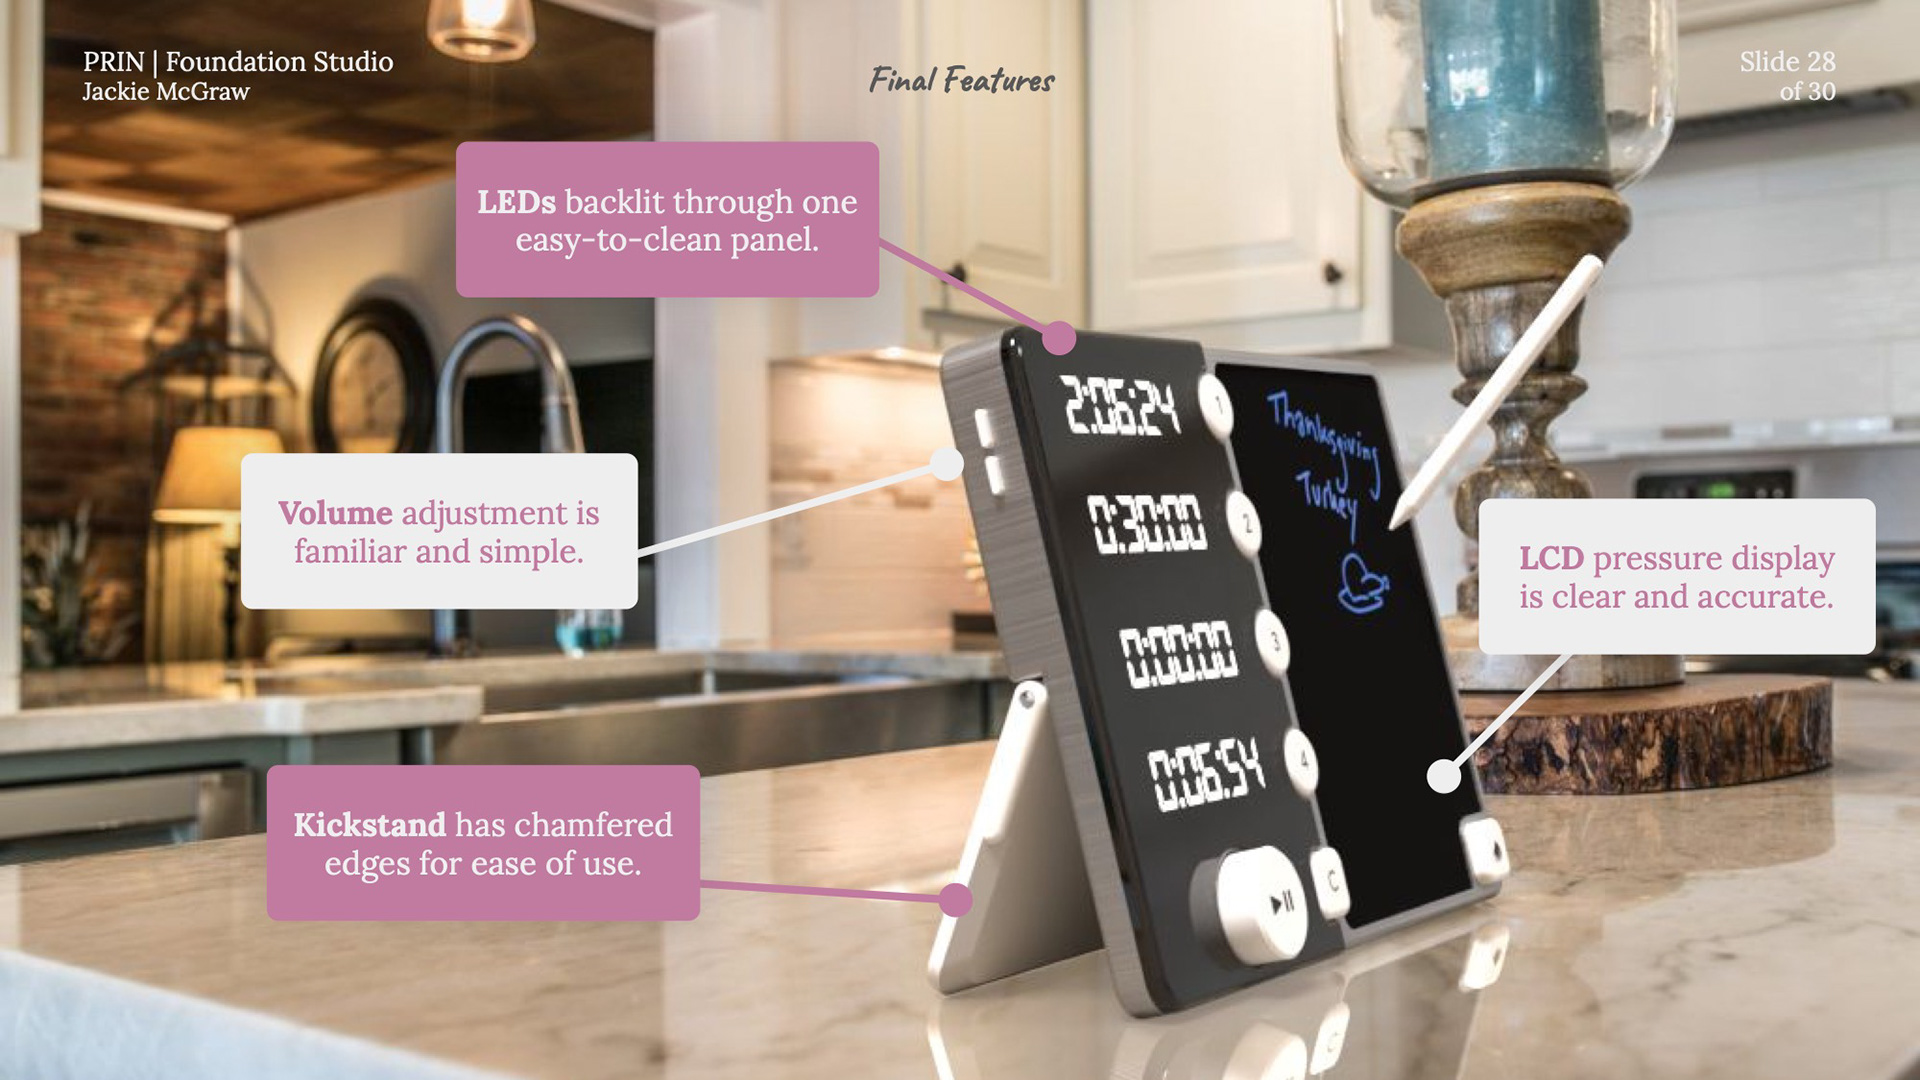
Writetime’s display diodes live behind a clear panel that’s easy to wipe off, and makes them stand out, for visibility from across the kitchen. The timer has familiar volume adjustment on the side, and sports an LCD labeling display that lets you write labels in a way that feels natural.
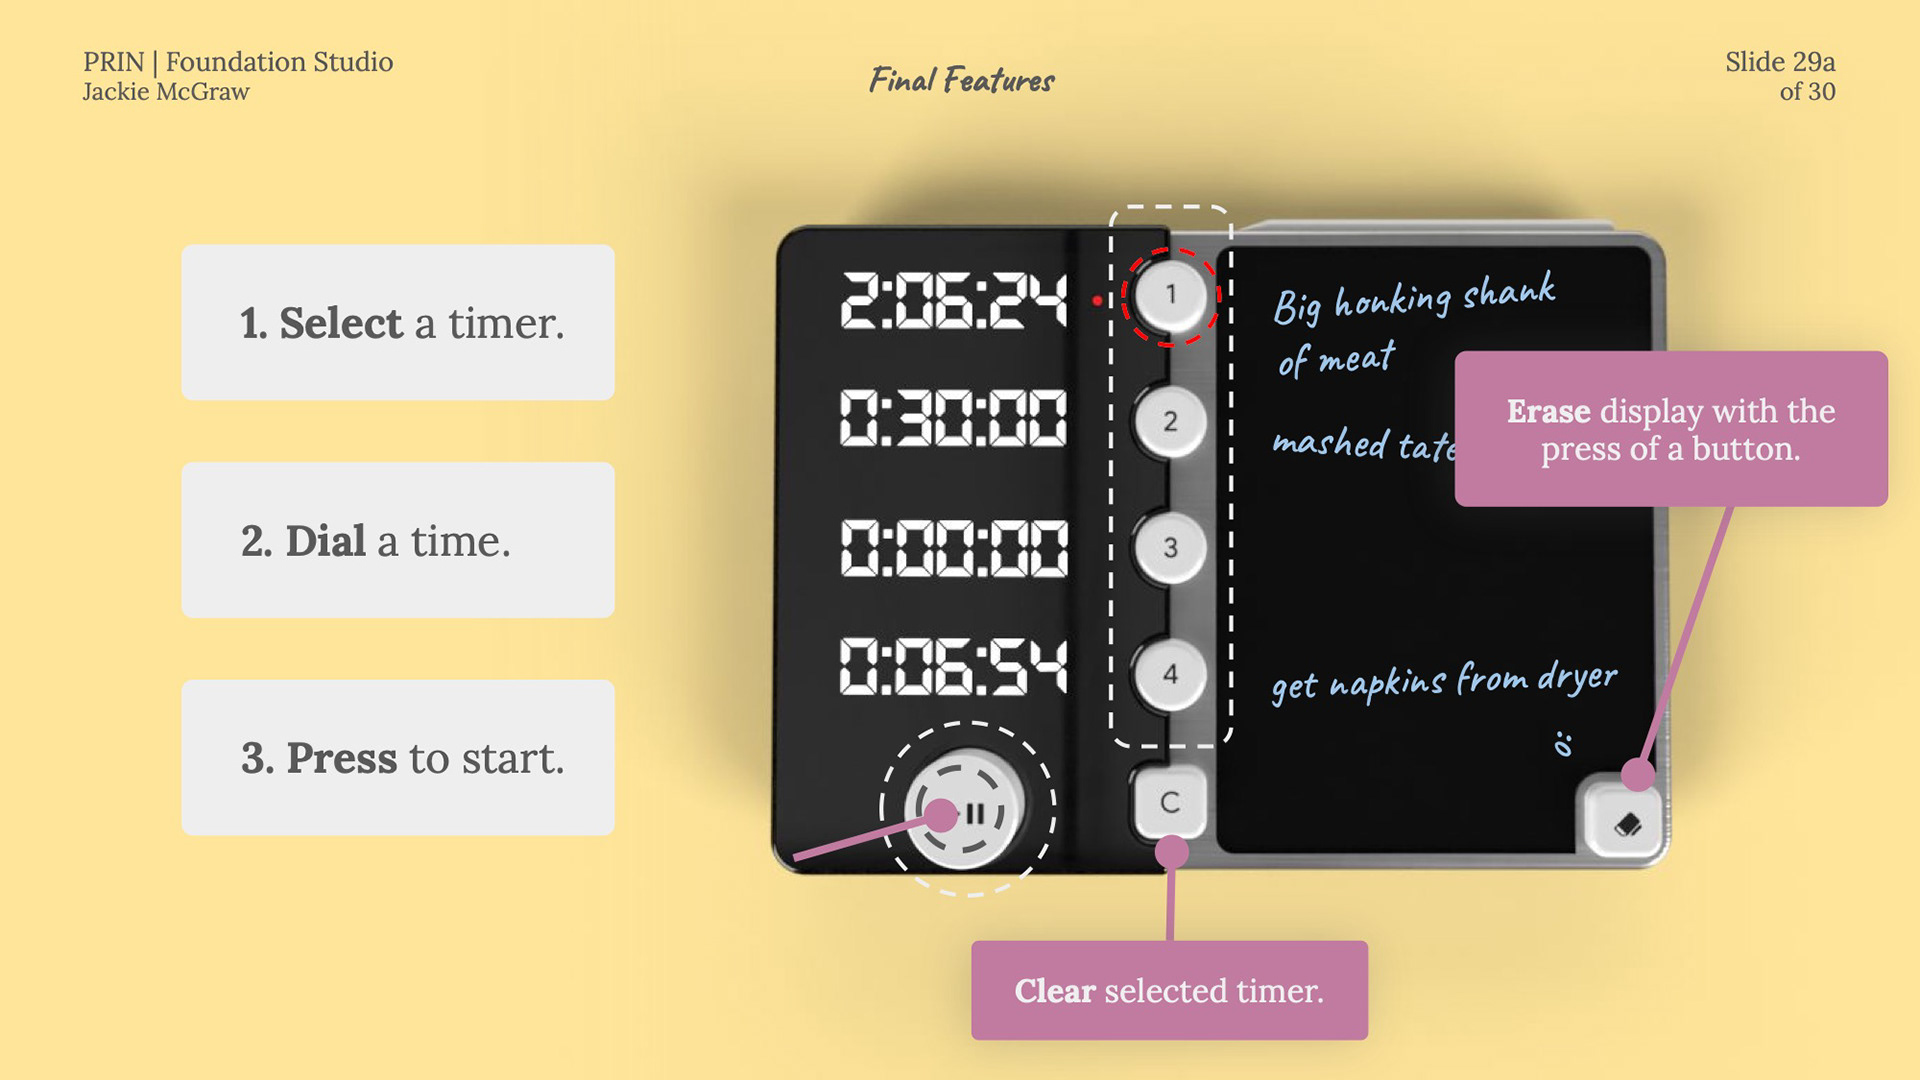
Now I’ll walk you through Writetime’s control scheme: select a timer, dial a time, and press the knob to start.
When you select a timer, it will quickly blink on and off each second to let you know its duration is being edited. To add time, simply select the timer, and spin the dial again. To clear a timer, select it, then press clear. If you start a timer from 00:00:00, it will count up.
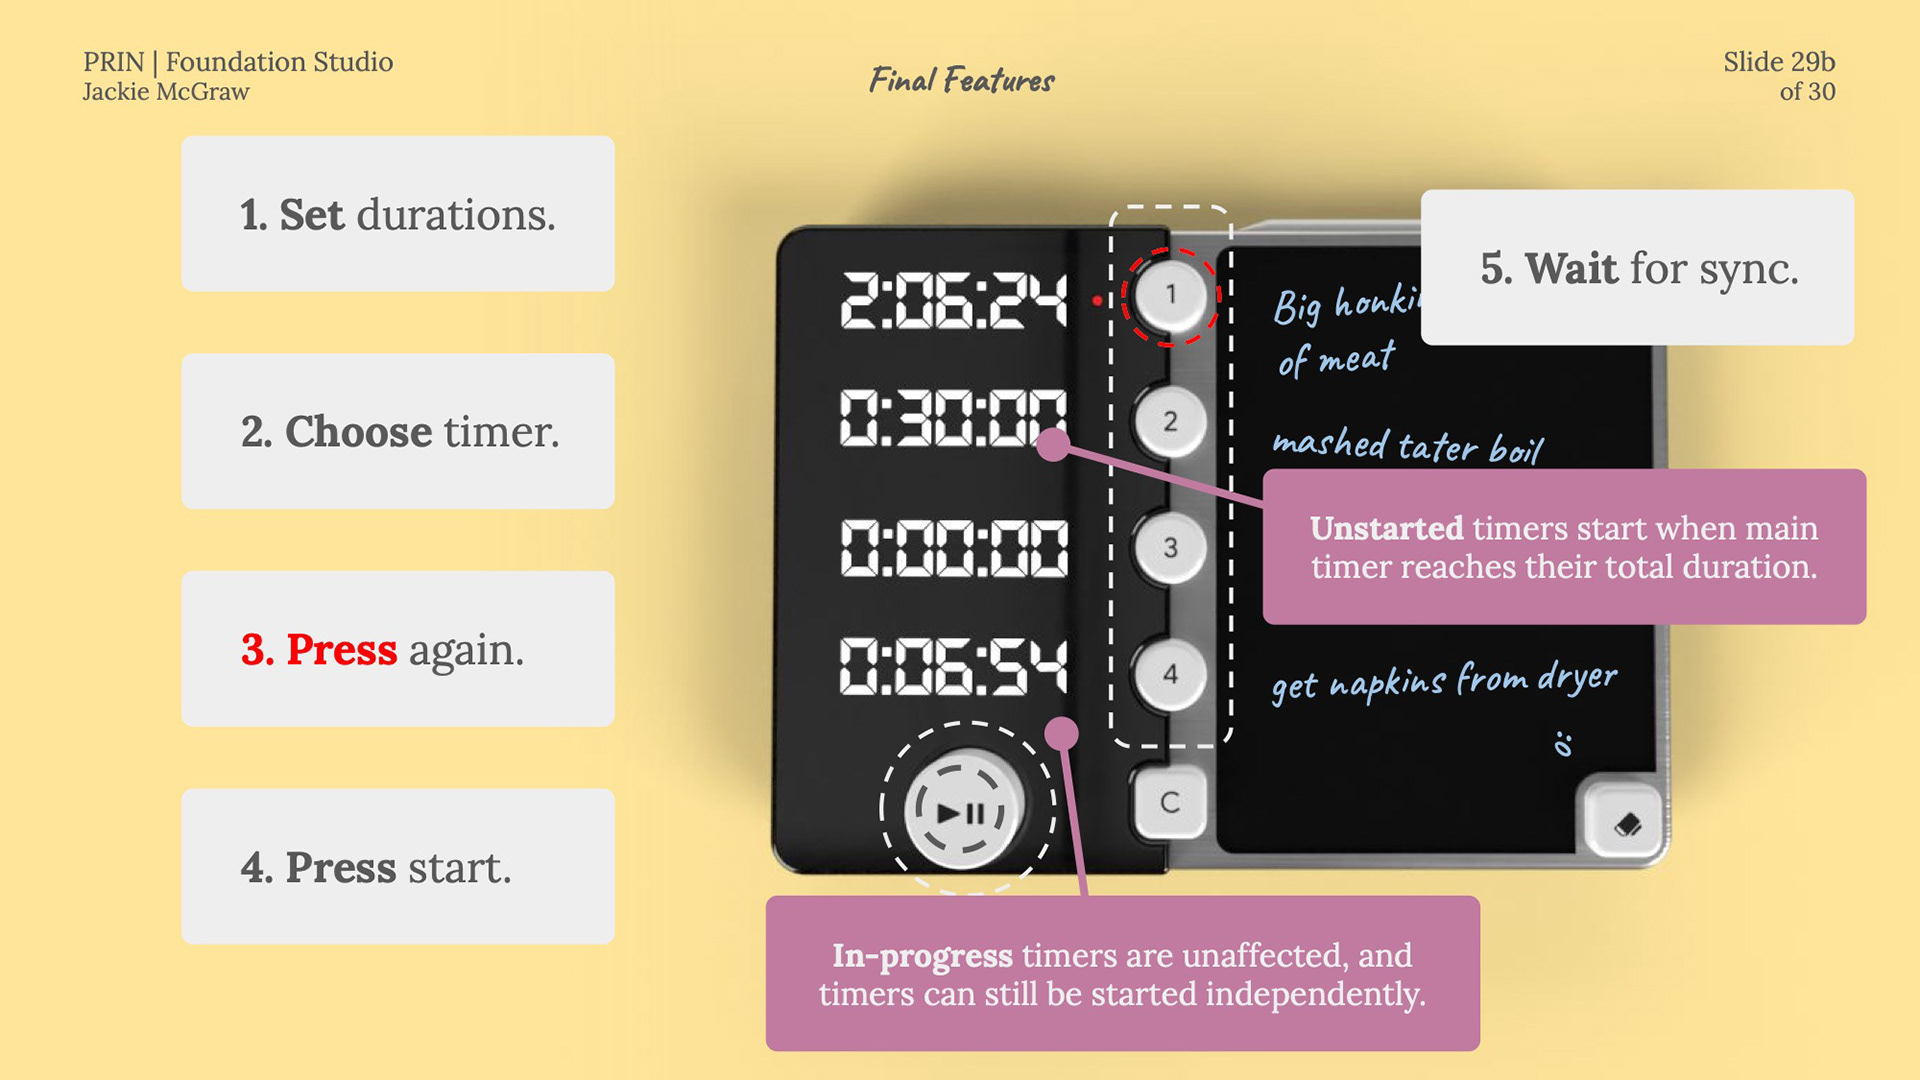
You might have noticed the red indicator light on timer 1—this indicates that the timer is ready for synchronized countdown mode, and is the 'main timer'.
Any timers that have a time set, but haven’t yet been started, will begin counting when the main timer counts down to their total duration—so when that big honking shank of meat has 30 minutes left in the oven, the tater-timer will beep and then start counting to let you know that it’s time to boil those suckers!
Timers that are already running will ignore the main timer, and you can start a new one at any time.
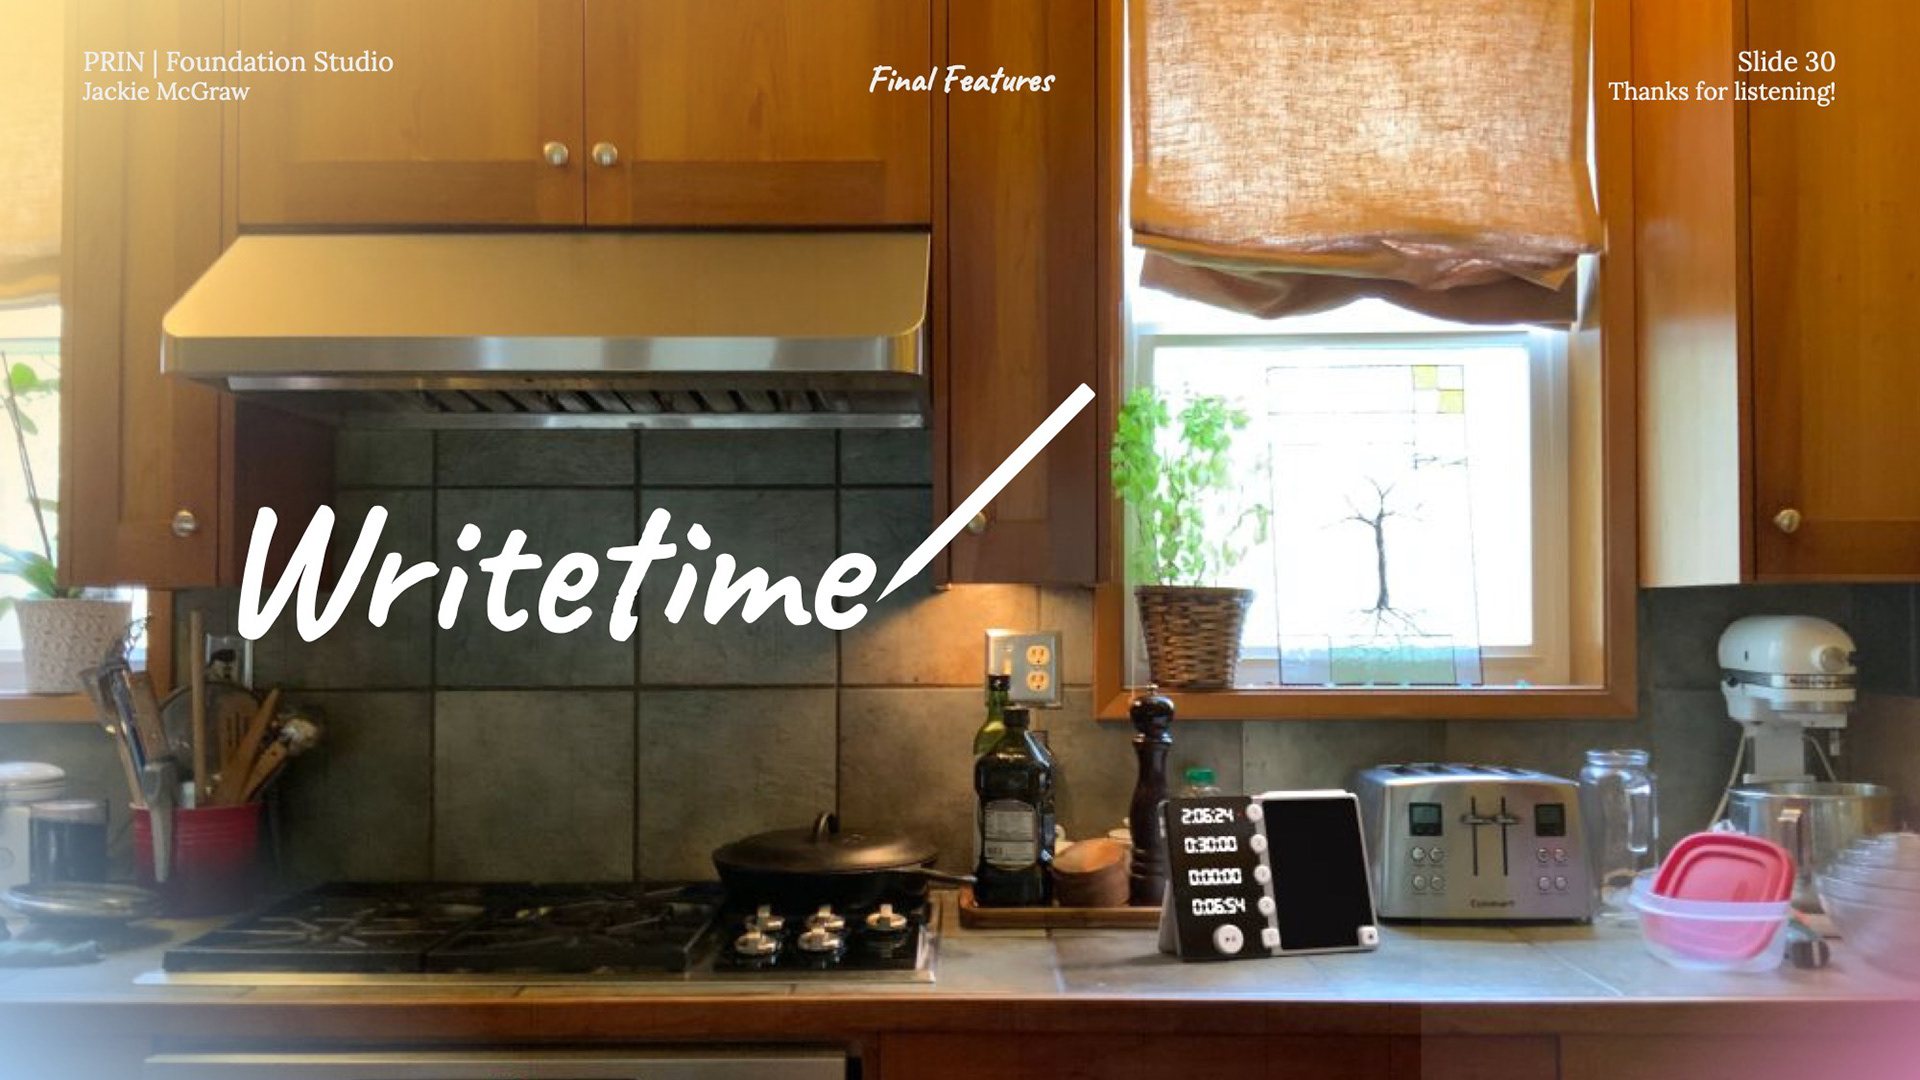
So there you have it—and here's how Writetime looks in the kitchen. I think it fits right in.